It is typical for the dryer to make a noise for a few seconds when the cycle starts. But if you find the continuous rattling noise coming from the dryer, it is an issue you must fix immediately.
The rattling noise from the washer might be due to the faulty drum roller. Inspect the drum roller and replace it if it’s damaged. The rattling noise can also be due to loose materials from your garments during the drying cycle. Pause the cycle and remove the loose materials to fix the issue.
This article will help you find out why your dryer makes a continuous rattling noise. You will also know the step-by-step process to fix the issue. So, keep reading.
Check out our list of top-handpicked products for all your electrical, appliance, and HVAC system needs to keep your home running smoothly.
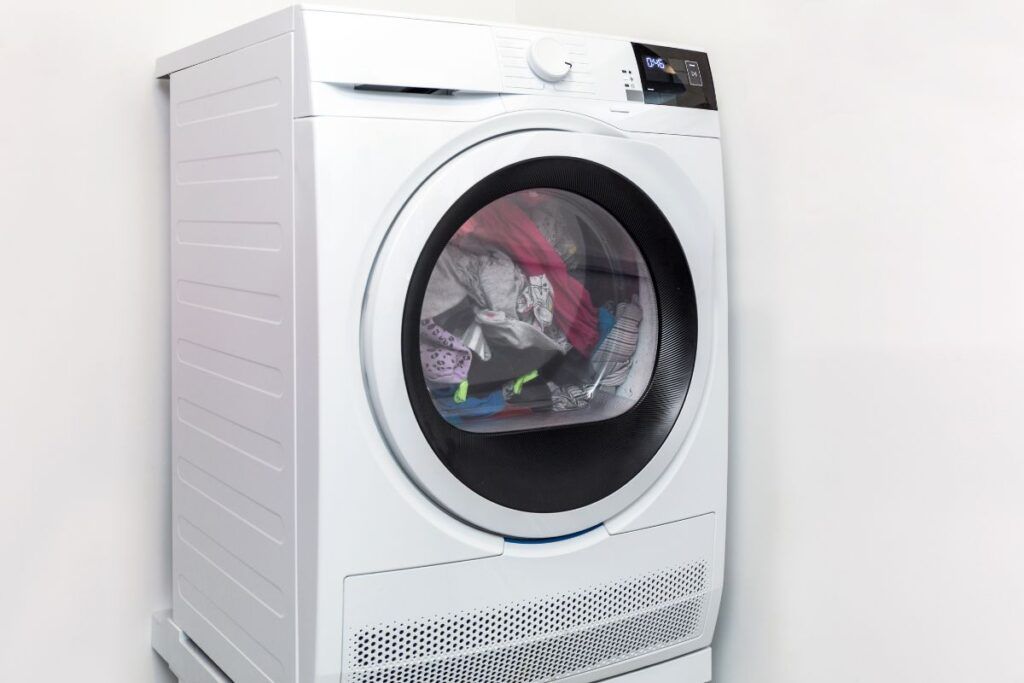
This post includes some affiliate links.Why is my dryer making rattling noises? (Quick fix)
A rattling dryer is enough to ruin the serenity of daily life, especially when your laundry is near your bedroom.
Recently my dryer started making a soft rattling noise, but I did not inspect the issue until the sound became hard to bear.
So, I learned that you shouldn’t wait for the situation to worsen and inspect it as soon as possible.
When I started inspecting why my dryer was making the rattling noise, I read about it and found some common reasons.
And I decided to share the same with you.
Here are the 6 common reasons why your dryer is making the rattling noise and a quick fix for each.
1. Faulty drum roller

You can find the drum roller on the back panel of the dryer.
Drum rollers secure the drum in place while the dryer cycle goes on.
If the drum rollers are damaged or worn out, they can make a rattling noise.
Dryers generally have two drum rollers on the rear side and another two on the front side of the drums.
You must access the dryer’s back panel to examine the drum rollers’ condition.
If you find two or more drum rollers are damaged, you must replace them all to increase the efficiency of the dryers.
A completely worn-out drum roller will lead to a noisy drying cycle.
It produces a rattling noise combined with a rumbling noise.
Here is the process of replacing the faulty drum roller:
- Start by disconnecting the electric supply if you have an electric dryer.
- In the case of the gas dryer, shut off the gas supply to the dryer as this process requires removing the internal parts. Don’t try to do this job alone.
- Instead, get help from your housemates and ask one of them to move the dryer away from the wall to make it comfortable to work.
- Now, take the lint screen out. You can find the lint screen on the top panel of the dryer. Remove the lint screen assembly from the top panel using a screwdriver to unscrew the bolts securing the lint assembly in the top panel.
- You must remove the dryer’s top panel to access the drum roller. Use a spackle knife to remove the edges of the panel. Secure it in a safe place.
- Next, disconnect the door switch by releasing the wire harness using the screwdriver. Remove the screws securing the front panel with the screwdriver. Secure the front panel in a safe place. Now you can access the drum.
- You can now remove the drum by taking off the idler pulley and the drive belt. After removing the drum, keep it in a secured place.
- Disconnect the support drum roller from the shaft.
- Now take the new drum roller to install it in a shaft. You don’t have to replace the shaft. Ensure it is cleaned before installing the new drum dollar. Place the drum in the shaft and connect the drive belt and the idler pulley back.
- Finally, reinstall the front and top panels by securing them with the screws you removed.
- Turn on the electricity or the gas supply. Run the dryer to check if it still makes noise. If it still makes noise, inspect for the other faults mentioned below.
2. Damaged drive belt

The drive belt is wrapped around the drum, tension pulley, and drive motor.
If the drive belt is damaged, the drum and the tension pulley will not be secured, causing the loud rattling noise.
If you find the drive belt damaged, there is no option to repair it other than replacing it.
Follow the steps given below to replace the drive belt of the dryer:
- Start by turning off the electric connection by unplugging the electric socket from the outlet. If you have a gas dryer, disconnect the gas supply by turning off the gas valve.
- With the help of the assistant, move the dryer away from the wall to get enough space to work.
- Now access the top panel where you can find lint housing. Take out the lint screw. Remove the lint housing from the top panel by unscrewing the screws securing both the lint housing and the top panel using the screwdriver.
- Depending on the model of your dryer, the location of the screws will differ. Inspect your dryer to find any screws you have to remove to disconnect the lint housing.
- There will be 2 to 4 screws securing the lint housing with the top panel, depending upon the model of your dryer. Use a screwdriver to remove the screws to separate the lint housing from the top panel.
- Now, use a spackle knife to remove the edges of the panel. Doing this will help you remove the top panel. Secure it in a safe place.
- Disconnect the door switch, and release the tap of the wire harness to disconnect them completely.
- It’s time to remove the front panel. Unscrew all the nuts to separate the front panel from the dryer’s body. Keep the screwdriver handy to remove the nut and bolt from the dryer. Refer to the user guide to see how many screws you must remove if you want to separate the front panel. Keep the separated front panel in a safe place.
- You can access the drive belt after removing the front panel. You can inspect the drive belt for any fault, and if it is completely damaged, take off the belt and install the new one. If you can’t see the belt after removing the front panel, it must be broken completely, and you can find it at the bottom.
- Now, you can attach the new drive belt by sticking the belt along the idler pulley. Then push it to wrap the belt around the motor pulley. Attach the front panel by fixing back the screws you removed. Reinstall the top panel and the lint housing.
- Turn off the electricity or the gas supply to inspect if the dryer is still making noise.
3. Damaged blower fan blade

You can find blower fan blades in the drive motor shaft.
The blower fan rotates to distribute the air in the dryer.
A damaged or broken blower fan blade makes a rattling noise.
In such a case, you have to replace the blower fan blade.
Follow these steps to replace the blower fan blade:
- Start by turning off the electric supply if you have an electric dryer. Turn off the gas valve if you have a gas dryer.
- Move your dryer away from the wall to make enough space to work.
- Remove the lint screen from the lint housing.
- Use a screwdriver to remove the screws securing the lint housing in the top panel. Remove the screws to separate the top panel and the lint housing.
- After removing the lint housing, remove the top panel from the dryer.
- Use a spackle knife to remove the edges of the panel. Doing this will help you remove the top panel. Secure it in a safe place.
- Disconnect the door switch, and release the tap of the wire harness to disconnect them completely.
- Use a screwdriver to remove the screws securing the front panel with the dryer.
- Remove the front panel from the dryer and secure it in a safer place.
- Now you can access the drum and the support drum rollers.
- Take out the idler pulley by pressing it on the right side, and it will transfer the pressure on the drive belt.
- Take off the drive belt from the idler and motor pulley.
- After doing all these, it will be easy for you to remove the drum from the shaft.
- Access the drive motor and locate the mounting clamp on it.
- As a next step, remove the mounting clamp and keep it in a secured place.
- You can find a blower fan on the back side of the drive motor. Take the adjustable wrench, and place it on the lateral side of the blower fan.
- Again, take another wrench to place it in a drive shaft which you can find in the front of the drive motor.
- Hold the blower blades tight, and spin the drive motor clockwise.
- Separate the back panel from the dryer by unscrewing the screws holding the back panel with the dryer. After removing the back panel, you can access the air duct.
- Remove the air duct by taking off all the screws. Keep the air duct in the same place where you kept all the removed items.
- Rotate the blower fan clockwise to separate it from the motor.
- Now you can fix the new blower fan on the shaft. After fixing it, rotate it counterclockwise to let the blower fan tighten onto the motor shaft.
- Start assembling everything you disconnected. Secure the clamps on the motor and fix the air duct in place.
- Now secure the back panel with the dryer by attaching the screws. Fix the disconnected drum back to the dryer. Reattach the idler pulley and strike the driver belt again.
- Fix back the front panel by attaching the screws to the dryer.
- Attach the lint screen and the lint housing to the top panel.
- Connect the electric supply and run the dryer to check if it is still making noise.
4. Scratching objects

Check if your dryer is too close to other objects.
If any external objects are scratching the dryer, it will make a rattling noise.
If the dryer is too close to the washer, it will vibrate.
It can be the reason your dryer makes a rattling noise.
To fix this issue, move the dryer from the other objects.
If any object is leaning against the dryer, remove it from that place.
5. Your dryer isn’t at a level
If you place the dryer on a bumpy surface, the drums inside the dryer might not rotate evenly.
Nowadays, dryers come with adjustable leveling bottoms.
Make sure you level the legs of your dryer to fix it on the unlevel surface of your laundry.
To fix this issue, you should level the surface of your laundry, or you must adjust the legs of the dryer.
It will fix the issue of the rattling sound of your dryer.
6. Loose materials inside the dryer

If you load the clothes on the dryer without checking the pockets, materials like the coin, buttons, and clips may settle inside the dryer, making a rattling noise during the drying cycle.
Here is how you can fix it:
- Stop the drying cycle immediately.
- Unload all the clothes.
- Check for loose materials inside the dryer.
- Remove them manually.
Doing this will stop the rattling noise of the dryer.
Also read: 6 Reasons Your Washing Machine Is Off Balance (+Fix)
How many years do dryers last?
The average lifespan of the dryer is about 12 years.
Dryers last longer than washing machines.
The lifespan of dryers depends on the frequency of the cleaning practice.
Clean the lint trap, lint filters, and the vent ducts of the dryer regularly.
Having the practice of deep cleaning once a month will elongate the lifespan of your dryer.
Is it normal for a dryer to make noise?
Dryers make a mild humming or buzzing noise for a few seconds while starting.
It is not normal if your dryer makes rattling, thumbing, and squeaking noises.
In such cases, you have to take immediate action to find the causes and fix the issue.
How much does it cost to fix a noisy dryer?
The cost of fixing the noisy dryer depends on your dryer’s fault.
It ranges from $75-450.
If the issue is minor, like replacing the drive belt, it will cost you $75.
Issues that lead to replacing the drums and the drive motors will cost around $400.
If you are hiring a professional, it will be expensive to fix the noisy dryer when compared to fixing it yourself.
Final thoughts
There are different types of noises in the dryer, indicating specific issues. If your dryer makes continuous rattling noises, it will be because of any of the causes mentioned in the article.
Rattling noise will often occur due to the loose materials left in the pockets of the clothes during the drying cycle. Before loading the clothes, check if the pockets are empty to avoid any trouble.
Call a professional plumber to fix the issue if you find any processes mentioned in the article difficult or too technical.
Also read:
- Dryer Lint Getting Past Screen: 8 Possible Causes+Fix
- Moving Washer And Dryer To Other Side Of Wall: A Step-by-Step Guide
Reference: APPLIANCE STANDARDS AWARENESS PROJECT, LG Official Guide, Kenmore User manual.