Grounding a sub-panel is as important as grounding the main panel. A subpanel is needed when the main panel has filled up, but you need a few more circuits. But how do you ground a subpanel for a detached building? Here’s what I found.
To ground a sub panel in a detached building, you need to install a grounding rod and connect it to the sub panel. Then, install ground wires and connect them to the sub-panel. Finally, test your grounding system. If you’re not sure how to do that correctly, hire a licensed electrician.
A subpanel will need a grounding only for a detached building. The main panel’s grounding will be enough in the same building. This article will provide detailed information about grounding a sub-panel, different ways to ground, and safety considerations.
Check out our list of top-handpicked products for all your electrical, appliance, and HVAC system needs to keep your home running smoothly.
This post includes some affiliate links.Understanding the importance of grounding a subpanel in a detached building
When your main panel is filled up, but you need to add more circuits to add a few more devices to your house, you can install a subpanel.
If you have installed a sub-panel in the same building, you don’t need to ground it because it will already be connected to the ground wire.
Some people have a detached building, like a workshop or garage, where they want to add devices.
Here, you can use a subpanel instead of adding a panel.
Since the sub-panel will work as the main panel to power the detached building, you must ground it.
Grounding a subpanel for a detached building is important in multiple ways:
- Grounding the subpanel will protect against electrical shocks and short circuits, especially during the lightning. The excess current will get diverted to the ground instead of the building.
- Grounding will protect the electrical devices of your house that can damage due to sudden electrical surges and lightning strikes.
- Grounding the subpanel is important for code compliance. According to the National Electric Code Article 250.32 (B) (1), a feeder or a breaker powering a detached building or structure must have a grounding conductor. So, failing to follow the codes results in penalty fines and failed insurance coverage.
Different types of grounding systems for sub-panel in the detached buildings

Grounding a sub-panel is similar to grounding the main panel.
For a perfect grounding, you need to know a few basics, like keeping the neutral and ground separate in the subpanels.
There are several ways to ground a subpanel in a detached building. The methods are similar.
Here are some possible ways:
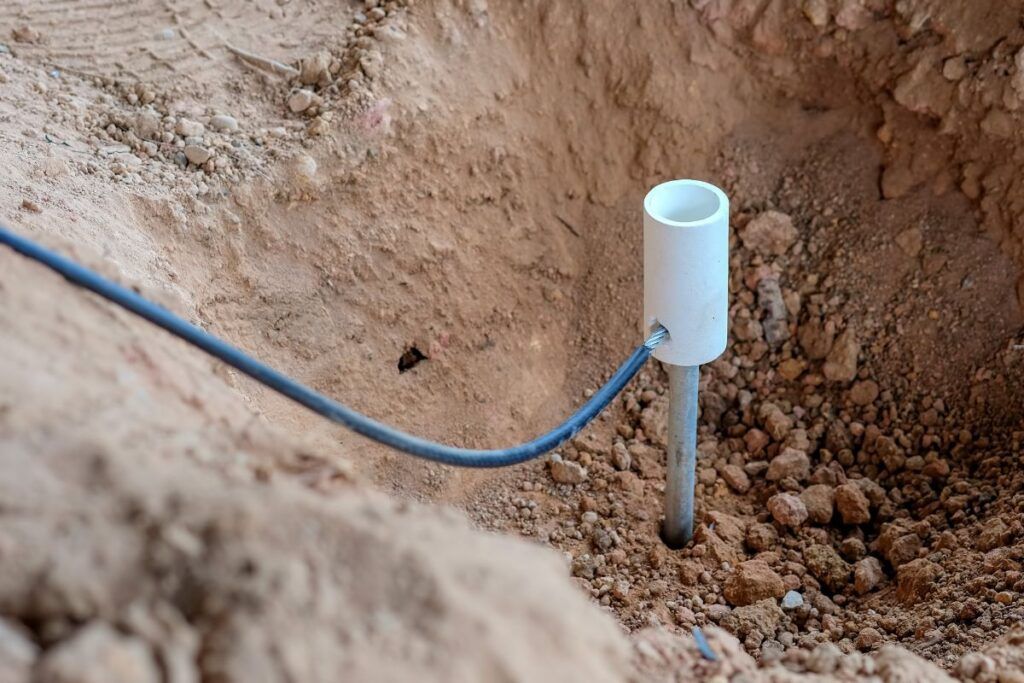
- A grounding rod system is a common and easy way to ground the subpanel for a detached building. The rod must be copper or galvanized steel, measuring 6 to 8 feet tall. Connect it to the ground bus bar in the panel with a copper wire. The wire size should be appropriate for the subpanel rating.
- The next way is by using a grounding conductor. A wire will connect the ground bus bar in the subpanel to the main panel’s grounding system or the detached building’s grounding electrode conductor. The conductor must be made of copper, and the size should match the subpanel’s amperage.
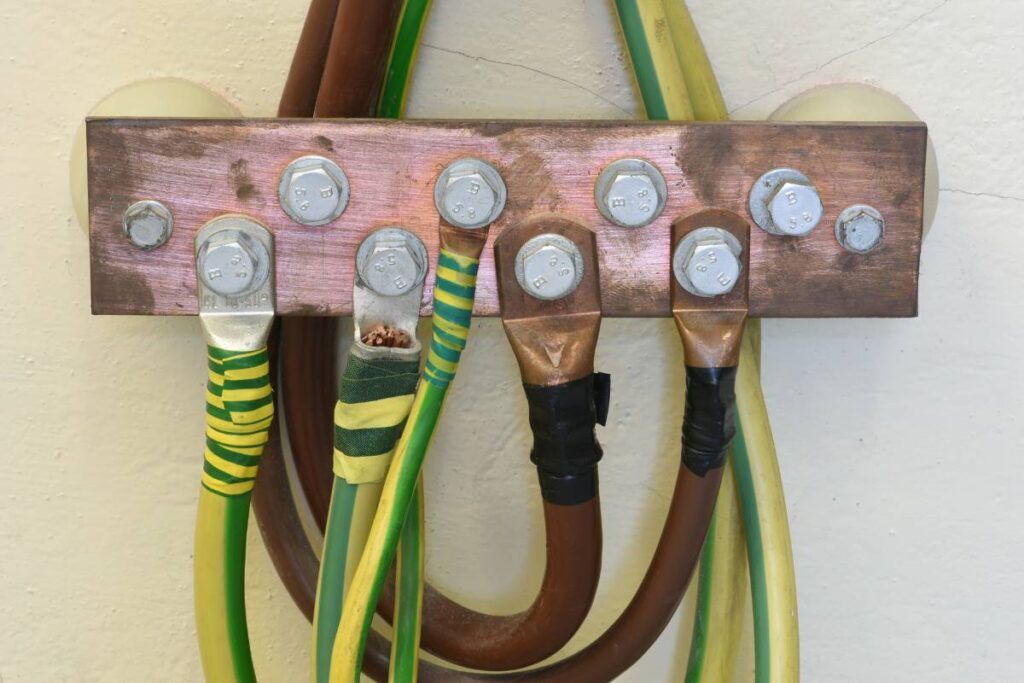
- Another grounding way is by using a grounding bus bar. It is a metal bar you attach to the subpanel to give place to the ground wires for connection. The bus bar has to be bonded to the subpanel enclosure with a bonding jumper wire.
- The Ufer grounding system is also known as the concrete-encased electrode system. Install a grounding electrode conductor in a concrete foundation or the detached building’s footing. The electrode will then be connected to the subpanel’s ground bus bar.
- In a grounding ring system, you install a conductive ring around the building’s perimeter and connect it to the grounding system. Then, connect the conductor to the ring and the ground bus bar in the subpanel.
- If you use a grounding plate, install it outside the detached building in the ground. Connect the plate to the ground bus bar with a grounding conductor.
- Another method is using a 10 feet long copper or galvanized water pipe. Attach a clamp, and connect a grounding conductor from the clamp to the subpanel’s grounding bus bar. Bond the bus bar to the subpanel enclosure with a jumper wire.
Despite many ways to ground a subpanel, people mostly use a water pipe, ground plate, or grounding rod.
I prefer using a ground rod. It is safe, convenient, and easy to install.
I have a separate subpanel for my detached garage and have used a grounding rod for the grounding.
I bought an 8 feet long rod, dug a hole, installed the rod, and then ran the required wires.
I kept the grounding rod a few inches above the ground to connect the wire from the electrode to the sub-panel.
Tools and equipment needed to ground a subpanel in a detached building

To ground a subpanel in a detached building, you need the following equipment:
- A grounding electrode
- A grounding conductor or wire
- Wire cutters
- Grounding lugs or clamps
- Screwdriver or wrench
Step-by-step instructions for grounding a sub-panel in the detached building
Grounding a sub-panel in a detached building is important to save the building and its electrical devices from short circuits and lightning strikes.
A grounding electrode will help you ground a sub-panel in the detached building.
A grounding electrode includes a ground rod, plate, or metal water pipe.
First, you should install the sub-panel.
If you have already installed it, you can move to the steps to ground it.
First, plan on the electrical wiring because random wiring can increase risks.
You need to pull four conductors – two hot wires, one neutral wire, and one ground wire.
Then, you have to separate the ground and neutral connection.
Here is a step-by-step guide to ground a subpanel in a detached building:
- To install the grounding electrode, dig a hole, and place the electrode in it.
- Install a grounding conductor to the grounding electrode with a grounding clamp. The conductor must be copper wire, and the size should match the subpanel’s amperage.
- Run the conductor from the electrode to the subpanel’s location.
- Install the subpanel in the detached building and connect the hot and neutral wires to their respective bus bars.
- Install a separate grounding bus bar. The neutral and ground are bonded in a main panel, but they should be separate in the sub-panel.
- Bond the subpanel’s grounding bus bar with the sub-panel’s enclosure with a jumper wire to ensure both have the same electrical potential.
- Connect the grounding bus bar with the grounding conductor using a grounding lug or terminal.
- Connect the grounding wire from the subpanel’s circuit to the grounding bus bar.
- Secure all the connections and test the grounding.
The process is the same for the other grounding systems.
If you use the Ufer system or concrete-encased electrode, pour a concrete foundation for the building and place a copper wire or rebar in the foundation’s center before the concrete settles down.
The wire or the rebar should be 20 feet long with a ½ inch diameter.
If you choose a metal water pipe, it should be free of corrosion, dirt, or rust.
You need to attach a UL-listed copper grounding clamp for tight electrical contact.
How to install a ground rod for a subpanel in a detached building?

Using ground rods to ground a subpanel is the most efficient way.
First, buy a ground rod made of copper or galvanized steel. Ensure the rod is at least 8 feet long and ½ inch wide.
The distance between the detached building and the grounding electrode should be 2 feet.
Here are the steps to ground a subpanel in a detached building with a ground rod:
- Find an appropriate place to install the rod. Avoid areas with rocks and pipes.
- Choose a high-quality and durable ground rod for proper functioning.
- Dig around 2.4 meters of a hole in the ground and insert the rod into it.
- Clamp the rod’s upper part to one end of the grounding conductor and the other with the subpanel where the ground and neutral wires are connected.
- Test the ground rod’s resistance with a multimeter or a clamp-on tester to ensure its functionality.
How to connect ground wires to the subpanel in a detached building?
The steps are already covered in the step-by-step guide.
However, I would like to briefly share it here for a clear understanding.
To connect ground wires, you first need to find the right wire gauge that matches the amp rating of the sub-panel.
Install a grounding electrode, like a water pipe, ground plate, or metal rod, and then the sub-panel.
Connect the hot and neutral wires to their respective bus bars.
Then, connect the ground wire to the separate grounding bus bar in the subpanel.
Bond the ground bus bar with the subpanel’s enclosure to ensure both have the same electrical capacity.
Test the grounding system with a ground resistance tester.
Tips for testing the effectiveness of the grounding system for the subpanel
After you have grounded the subpanel, you must check its effectiveness by measuring the ground resistance.
Follow the proper safety process while working with electricity.
Turn off the power at the sub-panel and then approach testing.
Use a digital multimeter to test the ground resistance.
Connect one probe of the multimeter to the grounding electrode and the other lead to the grounding conductor.
If the result is below 25 ohms, your grounding system works well.
Besides, check the voltage between the neutral and ground bus bars to ensure their bonding has separated.
If there is any voltage, it means there is a problem with the connection.
If you ever find any problem, call an electrician for help.
How do you troubleshoot grounding issues in a sub-panel for a detached building?
A grounding system in the subpanel of a detached building can face several issues if the connections are made incorrectly.
Here are some troubleshooting tips to fix the grounding issues in the subpanel:
- Check all the wire connections in the grounding system – conductor connections, bus bar connections, usage of the grounding lugs or terminals, and the device connected to the sub-panel. If you find any loose connections, tighten them properly. For corrosion, clean them with a wire brush.
- See if the wires are frayed or damaged. If they are, replace them immediately.
- Check for damaged signs in the grounding electrode, especially the rod or the plate. Fix the corrosion immediately and replace them in case of any damage.
- If the electrode is not working fine, it might be because it is not standing properly. Check the electrode regularly to ensure it is standing firmly in its place.
- Installing a grounding electrode in rocky soil can make the grounding ineffective. If the grounding resistance is incorrect, check the soil. Avoid rocky soils and areas where you suspect pipelines. After grounding, check the resistance to ensure it is working fine.
- The wire size is another place of issue. The wrong wire size can cause overheating and short circuits. The wire size must match the subpanel’s rating. Usually, the grounding conductor should be 6 AWG. The size can increase or decrease based on the subpanel size.
Safety considerations when grounding a subpanel in a detached building
While grounding a subpanel for a detached building, you must follow the safety considerations explained below:
- Do not use continuous metallic routes to connect the feeder to the destination in the detached building.
- The grounding conductor must match the subpanel’s amperage rating and should be made of pure copper.
- When you need to ground your subpanel, check if your detached building already contains a grounding rod. If a rod is present, you should bond all the rods to make an electrode grounding system.
- Do not bond the ground and neutral in the subpanel.
- Before installing the wires in the subpanel, check whether the grounding conductor is wire-type. In that case, you should choose a wire size per NEC Article 250.
- Check your detached building for continuous metallic routes between the feeder source and the destination. You might not have to install the grounding rod if there isn’t any.
- Wear protective gear like goggles and insulated gloves.
- Keep the power off while working with the electrical wiring.
When to call a professional to help ground a subpanel in a detached building?
Calling a professional for assistance is the best option for such electrical work.
Professionals can examine your house and the detached structure to determine how to ground the subpanel.
For example, if you use a ground rod or plate, you must dig a hole.
If you are unaware of the pipelines underneath the earth and start digging, you get more expensive damages.
Calling a professional can help you. The professional will arrive, find the pipelines, and then dig the hole for the electrode away from these pipelines.
The professional will also guide you about the suitable soil type for installing the rod in the earth.
These are some areas where professionals can be of great help.
Additionally, the professional can install the whole grounding system with the right wire connections without any mistakes.
If you doubt the pipeline locations, wire connections, and grounding installation, call a professional for help.
Some areas have hotlines. You can call these hotlines or directly the utility company for help.
Final thoughts
Separate structures powered by respective circuits should have a separate grounding system. There are several grounding methods, like using a ground rod, ground plate, water pipe, concrete-encased electrode system, grounding conductor, and grounding ring system. The installation processes are the same for all.
The electrode must be 8 to 10 feet long and ½ inch wide. If you use a plate, it should be at least 2 feet wide and 10 feet long. To connect the grounding electrode, dig a hole and install it, connect all the wire connections properly, and test the grounding system with a digital multimeter.
Make sure to separate the neutral and the ground. Follow the safety considerations and call an electrician if needed.
How much clearance does a
subpanel in a detached building need?
All the electrical panels, be it the main panel or the subpanel, should have 36 inches of clearance in the front, 30 inches across the panel’s face, and 78 inches from the top edge of the panel to the floor.
Why should we separate the ground and neutral on the subpanel?
When you connect the ground and the neutral, the current travels on the neutral and ground to return to the main panel, during an excessive current flow, current will flow through all items in the subpanel, including the enclosures, grounding rods, and wires, which can be dangerous.
Reference: Grounding System Wikipedia