The ice maker can make both crushed and cubed ice. It depends on the selection mode that you select. But if you select the cubed mode and the ice maker gives you crushed ice. Then it can be a big issue.
The ice maker will only make crushed ice if the temperature inside the ice maker might be too low or some ice might get stuck inside the lever behind the tray. Check the temperature, ensure it is set right, remove the ice tray, clean it with warm water, set it back, and try again.
In this article, I will show you the easy-to-fix method that can easily resolve the issue of your ice maker making crushed ice instead of cubed ice. So keep reading.
Check out our list of top-handpicked products for all your electrical, appliance, and HVAC system needs to keep your home running smoothly.
This post includes some affiliate links.Why is my ice maker only making crushed ice?
These are some common reasons why your ice maker only makes crushed ice.
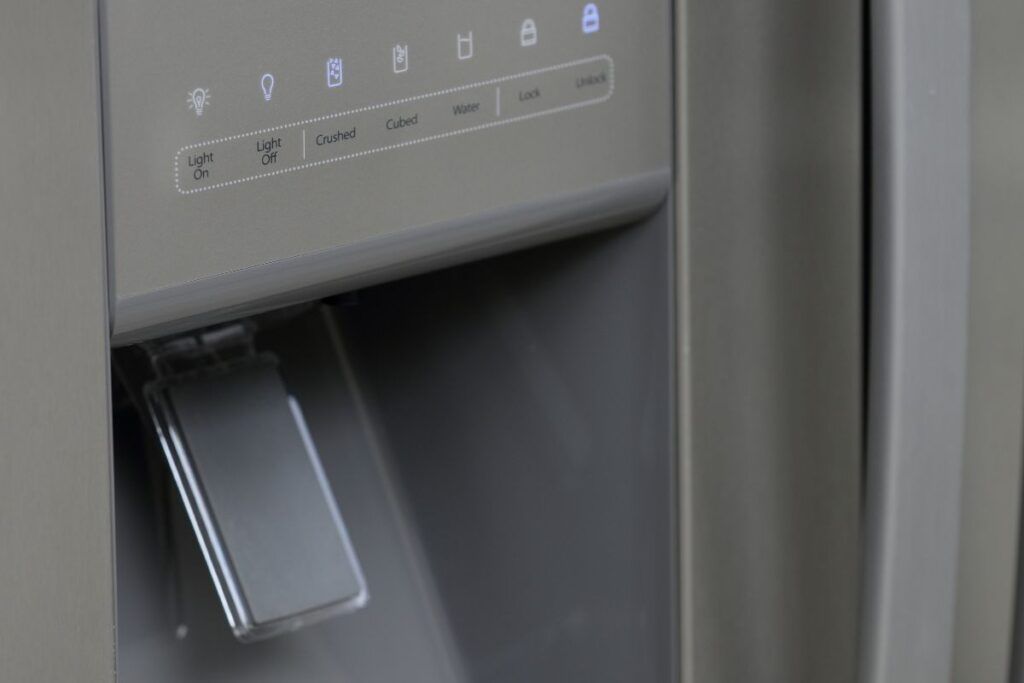
1. The ice maker is set to the crushed ice mode
When you buy a new refrigerator, the manufacturer has already set the default mode into the machine.
And in some fridges, the ice maker is set in the default crushed ice mode.
Therefore, every time you tap the ice dispenser switch, it gives you crushed ice.
2. The little tab window behind the ice tray isn’t working properly
When you pull out the ice tray from the ice maker, you can find a little tab window in the back wall of the ice bucket.
It moves up and down and helps make cubed and crushed ice.
If it moves up, you can get crushed ice; if it moves down, it gives cubed ice.
A lever always attaches to it and helps the tab to move.
The tab stays down if you select cubed ice.
But somehow, if the ice gets stuck on it and its window doesn’t come down, it can cause crushed ice.
3. Insufficient water pressure
Three things help an ice maker to work properly.
Water pressure is one of them.
Water pressure helps water to flow inside the ice maker.
If the pressure is insufficient, then enough water does not fill.
And you can get small crushed ice instead of cubes.
4. The shut-off valve issue
The shut-off valve is the main component that helps water to come inside the refrigerator’s ice maker.
If the valve leaks or is clogged with particles, the ice maker does not get enough water to make full-size ice cubes.
And that can be the reason your ice maker only makes crushed ice.
5. The lever is not working properly

If you pull outside the ice tray, you can find a lever, a spindle-type metal wire behind the tray.
It adds to the small little tab that is present on the back wall of the bucket.
The lever moves in a half-path.
When you set the cubed mode, this little lever stays up, and when you set crushed mode, it stays down.
But if the lever stops working because its spring becomes frozen or jammed, it can give crushed ice.
6. The plastic flap is not working
If you look inside the ice tray, you can find a plastic flap inside a big hole at the end of the tray.
The flap opens or closes when you move the lever up and down.
If the ice hole is filled in ice completely, then the lever will be up and helps the ice cube to come out by opening the flap.
The lever stops working if any ice cube gets stuck behind the ice bucket.
Or starts malfunctioning.
And it can give crushed ice.
7. Freezer temperature is too low
It is one of the common causes why your ice maker makes only crushed ice.
The optimal temperature helps to format the perfect ice cube.
If the refrigerator temperature is too low, the ice will break when it is collected from the ice maker.
And this can be the reason why your ice maker is making crushed ice only.
8. Problem with the refrigerator water filter

The water filter helps in the filtration of water and helps to move water inside the ice maker.
But sometimes, the water filter is clogged, can freeze, or needs to be installed correctly inside the refrigerator.
So that can be the reason for low water pressure, and that’s why your ice maker makes crushed ice.
9. Metal rod does not connect with the solenoid
If you pull out the ice bucket outside, you can find the motor and solenoid behind the bucket.
This solenoid is always connected with a thin metal rod.
If the metal rod does not connect with the solenoid, the plastic flap behind the ice tray will not move, which can make crushed ice.
10. Control panel is not working properly
You can find a control on the outside wall of the refrigerator, above the ice dispenser.
Sometimes the control panel does not work properly, that’s why it sends the wrong information to the ice maker.
It can be the reason why your ice maker makes only crushed ice.
How do I stop my ice maker from crushing ice?
So, until now, you have just known why the ice maker only makes crushed ice.
Now you will know how to fix it.
So, let’s get into the topic.
1. Select the right mode of selection

Before doing anything, check if you selected the right mode.
Sometimes we make some basic mistake, and the solution is so easy, but still, we call the technician and spend a lot of money on it.
So first, check if you have selected the cubed mode for getting cubed ice.
If you set it to crushed mode, reset it to cubed mode, and only then can you get cubed ice.
If you are still getting crushed ice, the problem lies elsewhere.
2. Reset
Sometimes a simple reset can resolve a big problem.
So before going to any other solution, reset the ice maker.
- To do that, first, open the refrigerator door and pull out the ice maker outside.
- And then push it inside the same place again.
- Once done, close the freezer door and set the panel switch in crushed mode, then cubed mode.
Check if you now get cubed ice or not.
3. Check if the ice maker is set to crushed mode
To check if the ice maker is automatically set to crushed mode:
- First, you should open the refrigerator door.
- Then, pull out the ice tray outside.
- Once it is done, look inside the ice bucket.
- You can see a white float switch that is kept up by default.
- You should keep the switch down if it is not.
- Reinstall the ice tray inside the bucket.
- Now close the fridge and select the cubed mode.
Check if you are getting cubed ice.
If you still can not resolve the problem, look for the next solution.
4. Resolve the issue of the lever located behind the ice tray
If you are getting any sound when the ice dispenser gives you crushed ice, it can be the reason for the lever or lever spring connected to the plastic flap behind the ice tray.
To get assurance, check inside the refrigerator.
If you check correctly, you can find that the sound comes from the little plastic flap on the backside of the ice tray.
The little plastic flap bottom of the ice maker tray moves behind noisily.
First, pull out the ice maker outside the freeze to know more about the issue.
In the backend of the ice maker, you find a thin little wire-like structure lever that can rotate. It rotates in half circular motion.
If the lever’s spring is frozen and the tab on the back wall of the ice bucket is freely moving, that’s why the plastic flap is moving noisily.
Somehow ice got clogged in the middle of the spring, which is why it’s happening.
To resolve the problem, pull out the ice tray outside and rinse the whole assembly with warm water, then the ice will melt.
Now reinstall the whole assembly and check if the ice maker is giving cubed ice.
5. Set the right temperature
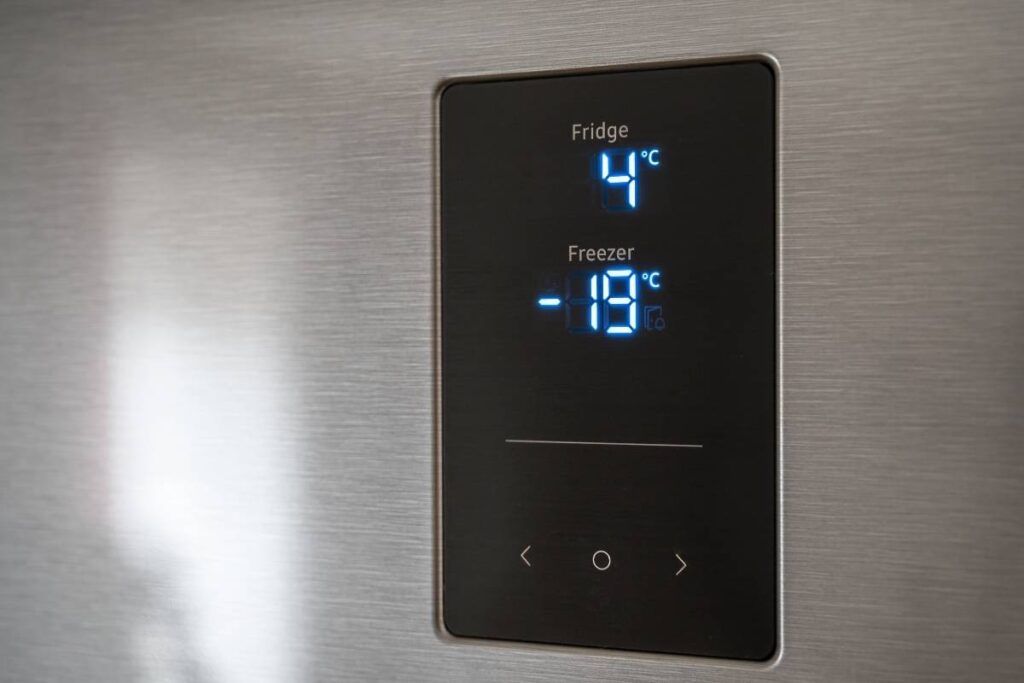
The optimal temperature for getting cubed ice is 64.4°F.
If the refrigerator’s temperature is less than optimal, the ice will break during the collection.
The simple way to fix the issue is by raising the temperature to 64.4°F.
6. Connect the metal rod with the solenoid
To fix the issue, first, pull out the ice bucket and look at the bottom of the bucket.
You can see a thin narrow metal rod and move it up and down.
It is connected to the lever.
And there is a plastic tab that does nothing when you move the metal rod.
To know more about the issue, open the refrigerator and select the cubed mode on the panel without closing the refrigerator’s door.
Hold down the “Close door” switch and push the ice dispenser like you want to get cubed ice.
Here, you should hear a somewhat loud click.
If you did not find any loud clicks, look where the rod goes in the back of your freezer.
You can see a white semi-circular shape plastic flap.
Reach in there with a screwdriver or a knife and look if it is moving freely or not.
If it is moving freely, then the issue may be with the solenoid.
So the next step is to remove the ice maker assembly outside the freezer.
- Unplug the refrigerator and move it away from the wall with someone’s help.
- Turn the water supply valve off.
- Take a screwdriver and unscrew the back panel of the fridge.
- Disconnect the inlet water valve tube with a wrench.
- Now unscrew the mounting screw.
- You can now take the solenoid out of the refrigerator.
- Check if the solenoid is stuck with ice or not. If it is stuck with ice, melt it and reinstall the assembly inside the fridge.
Also, check if a metal rod goes into the solenoid.
If you do not find it, you should buy a new assembly and replace it with the old one.
7. Resolve the water pressure issue
To fix the issue, you should first check the water shut-off valve.
It is located near the kitchen sink.
Check if the water shut-off valve is clogged inside or leaking.
- To do this, first, disconnect the water supply line.
- Next, tighten the packing nut of the shut-off valve and then connect the water supply line to check if the shut-off valve is leaking or not. If it leaks, you should install a new water shut-off valve.
- To install the new valve, first, remove the packing nut, remove the bolts and screws, and install the new valve inside.
- And if the valve is not leaking, then you follow the above steps, remove the water valve assembly, and check inside if there is anything clogged or blocked. And also clean it.
- Then reinstall all the parts and check if the issue is resolved now.
8. Replace the water filter

If the water filter is clogged or not set correctly, it causes low water pressure.
To check the condition and fix the issue, follow the steps:
- First, check the water filter indication light. Is it red, yellow, or green? If it is green, then the water filter works well. If it is yellow, you should order a water filter; if it is red, you should replace it. Once you get the red light, it is time to replace the old filter.
- The first step is to turn off the power of the ice maker. The location of the ice maker depends on the model and brand. So you can find the model name or location of the filter in the user manual.
- Now remove the filter by reading your refrigerator’s user manual, and install the new one inside it.
- And now, power on the ice maker and check if it works properly.
Final words
This article should help you discover why your ice maker only makes crushed ice. I have explained all the possible reasons and their fixes.
Before you disassemble the parts of the ice maker, make sure you check the basics. For instance, the ice maker selected cubed mode, the temperature is appropriate, or the ice maker got enough water pressure.
If you think you cannot handle it yourself, seek professional help by calling a technician or the customer service number.
Also read: 5 Reasons Your Ice Maker Is Not Making Ice (+Fix)