Maytag washer is an efficient and trustworthy appliance known for its rapid wash technology. If your Maytag washer takes too long to wash the clothes, it must be due to the faults in the washer. Let’s understand the common causes and quick fixes to solve the issue.
Your Maytag washer will take too long to wash if you use excessive detergent. You can fix this by reducing the quantity and choosing a high-quality detergent. Another common cause is the overloading of the drum. A faulty load sensor can also cause the issue. In such a case, you must replace it.
In this article, you will understand 7 common causes of why your Maytag washer takes too long to wash and quick steps to fix the issue. So, keep reading.

Check out our list of top-handpicked products for all your electrical, appliance, and HVAC system needs to keep your home running smoothly.
This post includes some affiliate links.What is my Maytag washer taking a long time to wash?
Maytag washers are efficient appliances that gained people’s trust with their rapid wash technology.
This rapid wash feature of the Maytag washer is the most useful feature to meet urgent laundry washing needs.
If the Maytag washer takes longer to end the washing cycle, it may be due to faults.
Here are 7 common reasons your Maytag washer takes too long to wash.
1. Usage of excessive detergent

Using good quality detergent is crucial to prevent the washer from getting faulty.
Often people associate using excessive detergent with extra shine and cleaning.
But that’s far from the truth.
If you use excess detergent than required, it will cause several issues like leaving suds in clothes and extending the period of the washing cycle.
In the long run, excessive detergent results in the detergent build-up in the drum, which reduces the efficiency of the washing cycle.
The Maytag washer has an inbuilt sensor to detect detergent in the drum after water is drained.
When the sensor detects the excess suds in the drum, it will begin a new rinsing cycle to clean the washer’s time, resulting in a long washing cycle.
If the water drained at the end of the washing cycle is detergent free, a washer will turn on the spin cycle.
So, next time you load the washer, ensure to use the appropriate amount of detergent mentioned in the user manual.
Read the instruction below to understand how much detergent you must use:
- If you use a highly efficient washer, you must use 1 tablespoon of the detergent.
- Using the normal washer, you can use 2 tablespoons of the washer. However, it differs based on the concentration of the detergent you chose.
Consider referring to the detergent label to get an idea of how much detergent you can use in your washer.
Also read:
- Can You Put Detergent Directly On Clothes? (+The Correct Way)
- How To Remove Hardened Detergent From Washing Machine?
2. Faulty load sensor

The Maytag washer has a load sensor that detects the load of the drum.
Depending on the load determines how much water is to be filled in the washer’s drum.
If the load sensor is faulty, it may extend the time of the washer.
To fix this issue, you must replace the load sensor:
- Begin by unplugging the power supply from your washer.
- Unthread the screws holding the control panel to detach it from the washer.
- Pull the control panel forward, and you can locate the load switch attached to the control panel.
- Detach the hose attached to the load sensor.
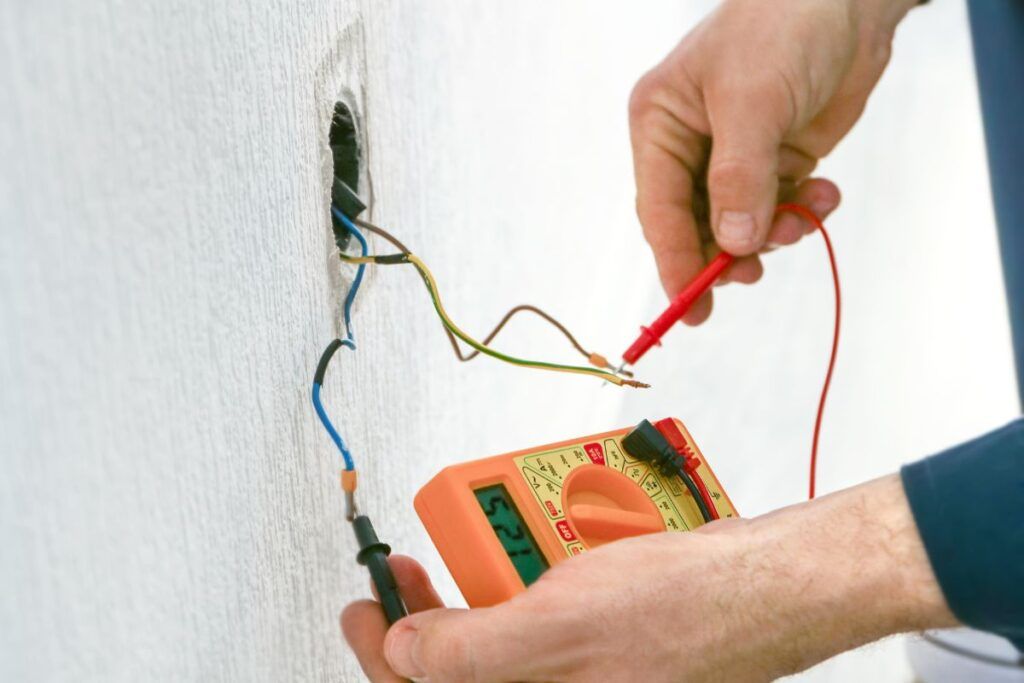
- Using a multimeter, check the continuity of the load sensor. If the load sensor doesn’t show continuity, you must replace it.
- To check the load sensor with the multimeter, you must unplug the washer from the electric outlet.
- Next, you need to turn off the water supply valve.
- Set the timer of the beginning cycle and switch on the washer.
- Prepare the multimeter by setting the initial reading and connecting the terminal.
- After setting up the multimeter, replug the washer into the electric outlet.
- Access the load sensor and take the reading between violet and white wires.
- The reading between the wires must be 124 V. Next, take the reading between pink and white wires; the desirable reading is 124 V. Take the reading between the white-red and white wires, which must be 124 V.
- If the load sensor doesn’t display the above readings, you must replace the load sensor. Before replacing it, ensure the washer is unplugged from the electric outlet.
- Uninstall the switch knob and remove the hose pipe attached to the load sensor.
- Detach the wire harness and remove the load sensor completely from the control board.
- Replace the new load sensor and twist it in place.
- Reconnect the wire harness and the hose tube.
- Reattach the control panel and secure it with the screws.
- Plug in the washer and let it undisturbed for 30 minutes.
- Restart the washing cycle and check if the issue is solved.
Try out the fixes below if your Maytag washer still takes a long time to complete the washing cycle.
3. Damaged water inlet valve
The water inlet valve lets the water inside the washer’s drum during the washing cycle; it opens and closes according to the water requirement in the washer.
If the water inlet valve is faulty, it won’t let the waterfall in the washer’s drum with the desirable pressure.
It automatically leads to a longer washing cycle.
To fix this issue, you must replace the water inlet valve:
- Unplug the washer from the electric outlet to avoid electrical elocution.
- Turn off the water supply valve.
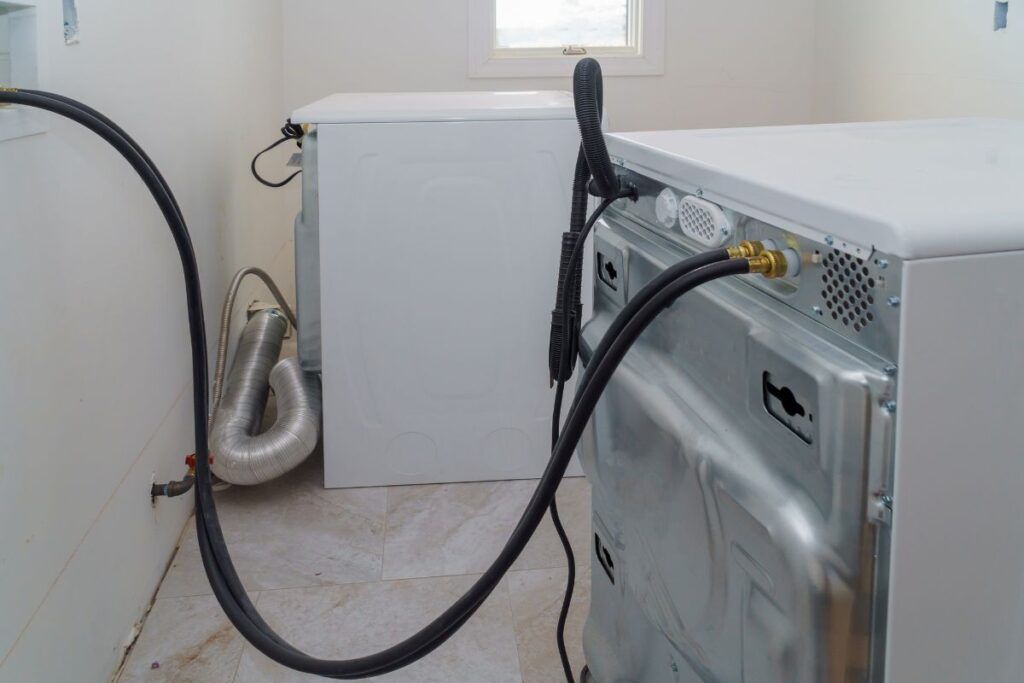
- Move the washer forward to access its back side.
- Locate the hot and cold water hoses. Using a channel lock plier, disconnect the hot and cold water hoses.
- Remove the control panel from the Maytag washer using a putty knife. Disconnect the wire harness from the control panel.
- Remove the top back panel by unthreading the screws securing it.
- You can locate the water inlet assembly in the left corner of the control panel.
- Remove the screws securing the water inlet assembly and set it aside.
- Replace the new water inlet assembly and secure it with screws.
- Reconnect the wire harness with the control panel.
- Put the control panel in place and lock it with the tabs.
- Reinstall the top back panel and secure it with screws.
- Reattach the hot and cold water hoses and secure them with the locking tabs.
- Turn on the water supply valve.
- Plug in the washer to the electric outlet and switch it on.
Let the washer sit undisturbed for 20 minutes and begin the washing cycle.
Check if the washing cycle is regularized, or follow the fixes below.
4. Overloading clothes in the drum

Overloading clothes in the washer’s drum led the washer to be off-balanced.
If the off-balance occurs in the washer, it will take a long to end the washing cycle.
You can fix this issue by loading the drum evenly.
Before beginning the washing cycle, ensure all the sides of the washer have equal weight.
When you load the heavy items in the drum, the washer fills the water to balance the load, which automatically leads to excess washing time.
It will increase the electrical and water expenses and also will cause damage to the washing machine.
To avoid this, load the heavy and light clothes together and manually distribute the clothes around the agitator to prevent the clothes from settling in one place.
If you load very few clothes, it will also cause an off-balance in the washer.
So, it is always better to follow the user manual’s instructions to learn how to load the clothes efficiently.
5. Faulty water level switch

The water level switch functions as the signal transmitter, which passes the signals to the time control to the inlet valve when the washer’s tub is empty, and it is necessary to fill the water.
If the water level switch is faulty, there will be fluctuations in the filling of the washer’s drum during the washing cycle.
In such a case, you must replace the faulty water level switch.
Follow the steps to replace the water level switch:
- Unplug the washer from the electric outlet.
- Move the washer from its original position to a comfortable place.
- To do so, turn off the water supply valve. Disconnect the drain and the water supply hose using a wrench.
- Remove the top panel from the Maytag washer by unthreading the screws using a screwdriver.
- You can locate the water level switch on the right side of the washer behind two control boards.
- The water level switch is connected to the pressure hose, and you need to reach your hands underneath to pull the pressure hose from the water level switch.
- Now you can remove the water level switch by rotating it clockwise. Push the water level switch to remove it from the washer by disconnecting the wire harness.
- Reconnect the wire harness to the new water level switch and rotate it anticlockwise to secure it in place.
- Reattach the pressure hose to the water level switch and twist it tight.
- Realign the top panel with the washer and secure it with the screws.
- Move the washer to its place and turn on the water supply valve.
- Reattach the drain and water supply hose.
- Plug in the washer and switch it on. Check if the washing cycle is regularized.
6. Faulty suspension rods

Suspension rods are located at the bottom of the washer, and it helps to control the excess movement of the washer’s drum.
It will help the washer balance while the washing cycle goes on.
When the suspension rod is worn out, a washer vibrates excessively and delays the washing cycle.
And also, it will damage the washer if it keeps vibrating.
In such a case, you must replace the suspension rods:
- Unplug the washer from the electric outlet.
- Turn off the hot and cold water supply valves.
- Disconnect the drain hose and water supply pipes from the back side of the washer.
- Remove the upper back panel by removing the screws and securing it with the washer.
- Remove the control panel by unthreading the screws securing it.
- Remove the top panel of the washer by removing the screws securing it.
- Detach the helper spring of the washer’s drum by lifting the securing rod.
- Hook the rods to the washer’s side wall.
- By following the same method, disconnect all other helpers’ springs.
- Realign the top panel, lock it with tabs, and tilt the washer to its side to access the bottom panel of the washer.
- Remove the bottom panel of the washer by unthreading the screws.
- You can access the 4 suspension rods you have disconnected from the spring.
- Remove all 4 suspension rods and discard them.
- Replace all 4 suspension rods with the new one and compress it to the top of the washer.
- Bring the washer back to the upright position.
- Pull the top panel and attach the springs with the suspension rods.
- Make sure you secure the washer’s drum to prevent vibrations.
- Reconnect the drain hose and water supply pipes.
- Turn on both the hot and cold water valves.
Push the washer to its original position and plug it into the electric outlet.
Begin the washing cycle and check if the washing cycle time is regularized.
7. Voltage fluctuations
If all the fixes mentioned above didn’t help, a voltage fluctuation must be causing the issue.
If there is a low voltage supply to the washer, the washing cycle may resume in between, leading to a longer washing cycle.
Check if your washer receives a regular power supply to fix this issue.
If you find voltage fluctuation in your laundry room, you must seek help from a professional to fix the issue.
When you continue using a washer on a low voltage supply, the inner component of the washer will get damaged frequently.
How long does a normal Maytag wash take?
If your Maytag washer works perfectly well, the normal wash cycle time ranges from 50 minutes to 1 hour.
However, a washing cycle may extend based on load size and the washing cycle you selected.
Consider referring to the owner’s manual to learn more about the washing cycle of the Maytag washer.
How do I reset my Maytag washer?
Resetting helps to clear the control panel glitches in your Maytag washer. It also reboots and re-energizes the washer.
Follow the steps below to do a hard reset in your washer:
- Unplug the washer from the electric outlet.
- Wait for 5 to 10 minutes to let the electric charges discharge from the washer.
- Plug in the washer after 10 minutes and switch it on.
Final thoughts
It is important to look for the faults in your Maytag washer when it takes a long time to end the washing cycle. If you leave it unbothered, you might want to face complex issues in the future.
When your washer takes too long to wash the clothes, it must be due to the causes mentioned in the article. One of the important causes of this issue is overloading your washer. It gets the washer to be off-balanced, thus extending the period of the washing cycle.
Other common causes of using excessive detergent faulty load sensors, faulty water lever switches, and faulty suspension rods. Using excess detergent may be the obvious reason when you see clothes come out of the washing cycle with suds in them. To fix this issue, reduce the quantity of the detergent you usually use.
If you find the load sensor is worn out, you must replace it. And same goes for the water level sensor. Follow the steps mentioned in the article to replace the faulty parts.
Also read: How To Fix UL Code On Maytag Washer?
Reference: Maytag Front Load Washing Machine Official Troubleshooting Guide, Maytag Top Load Washing Machine Official Troubleshooting Guide.