Moving the washer and dryer may seem daunting. But it will be worth it when you can enjoy an organized and hassle-less laundry experience. If you want a step-by-step guide on moving your washer and dryer to the other side of the wall, you are at the right place.
Start by making arrangements on the other wall, then unhook the connections between the washer and dryer and the wall. Move the washer and dryer using a trolley and connect them with all the connections on the new wall. Repair the previous wall, and you will be good to go.
Moving the washer and the dryer is a common activity you can do if you know the necessary steps. Read this article till the end to know everything about moving the washer and dryer to the other side of the wall.
Check out our list of top-handpicked products for all your electrical, appliance, and HVAC system needs to keep your home running smoothly.
This post includes some affiliate links.Steps to move your washer and dryer
Moving the washer and dryer seems daunting at first.
And I was in your place when I first thought of doing this.
But I researched, talked to a few experts, and now I know it is not as hard as I thought.
Here are the steps you should follow to move your washer and dryer:
1. Get the tools handy
Moving the dryer and washer can become difficult if you don’t have a prior plan.
So always start with a plan.
The first step is to gather all the tools and equipment required to move your laundry.
If you are unaware of the tools required to move the washer and dryer, check the list below and assemble all these tools.
- Hacksaw
- Screwdriver
- Plumbing pipe caps
- Circular saw
- 120-volt circuit box
- Vent duct
- Adjustable wrench
- Pliers
- P-trap
- Sanitary tee or 90-degree elbow
- Hose clamps
- Wall paint
- Putty knife
- Sandpaper
- Protective pieces of equipment
- PVC pipes
2. Make necessary arrangements on the wall

If you have decided on the exact side of the wall, you need to relocate the washer and the dryer.
Make the necessary arrangements before you bring the washer and dryer to the wall.
You can even flip the connection if that is possible in your case, or else you can follow these steps.
Check the wall: Before moving the washer and dryer, check if the wall has enough space for easy accessibility.
Plumbing setup: If you want to move the machines to the other side of the wall, you must install the necessary plumbing setup.
In the washer’s case, you will need hot and cold water pipelines.
So it would be best if you connected the water supply.
Also, you need to install a separate valve for both hot and cold water hoses to connect.
In addition, there should be a separate hose for draining the water.
You must install the drain outlet near the washer to collect the water.
When it comes to the dryer, you can find a gas pipeline.
To connect the hose, you must install the valve to switch it on and off.
There will be a ventilator hose to emit the hot air outside.
A better understanding of the washer and dryer’s functioning will help you make the process easy.
To do all this plumbing setup, you can also choose to seek the help of professionals.
It would help if you made holes to make 4-prong dryer outlets on the wall and used drills and the tools mentioned above to make it easy.
You can use a circular saw to cut the walls to access the pipes and hoses.
Electrical setup: You must install the 120-volt electrical unit to supply the required electricity to the machines.
In addition to the electrical unit, you need to install an electrical outlet for the washer and the dryer.
After installing the outlets, ensure the electric connection through the circuit.
Consult the user manual or hire a professional to install the electrical setup.
You will also have to give ground wire connections.
In this situation, you must seek professional help.
Gas line connection: If you have a gas dryer instead of an electric dryer, it will burn natural gas or propane to power up the drying process.
In such a case, you must have a gas supply.
Final check: After working on the plumbing and electrical setup, ensure you have done everything correctly because last-minute changes can slow down the process.
Consult the technician to ensure everything is done right.
Making all these arrangements beforehand will save you time so you can do this relocation process without hindering day-to-day activities.
3. Unhook all the connections
Here is the step-by-step process to unhook the washer and dryer connection from the previous location.
- Disconnect the water supply: Before disconnecting the washer and dryer, turn off the water supply. Disconnect the water supply by turning off the hot and cold water valves. You can also directly turn off the main water supply connection.
- Turn off the electricity: To avoid accidental damage, turn off the electric supply. You can disconnect the electricity by unplugging it from the electric board or turning off the breaker connection. Use the voltmeter to ensure that the electricity is turned off.
- Move the washer forward: After turning off the electricity, it is safe to perform any operations. Pull the washer away from the wall to make the space necessary to perform the upcoming functions. If you feel it is too heavy to move forward alone, take help from your mates.
- Keep a bucket: While disconnecting the hoses, there are chances of leakage. So, it is important to have a bucket that can collect the excess water. Place the bucket near the hot and cold water valves to collect any excess water leakage.
- Disconnect the hoses: The hoses are secured by clamps. Remove the clamps by turning them in a clockwise direction until the clamps are loosened. Now you can disconnect the hoses by putting them away from the valves. Don’t point the ends of the hoses on the floor. Instead, point them to the bucket placed below.
- Disconnect the electrical connection between the washer and the dryer: You can use a screwdriver to disconnect the washer from the dryer. Now move the washer and dryer away from each other.
- Secure the agitator: You can see the agitator in the top load washers. Make sure they are secured with the shipping bolts before moving.
- Disconnect the drain hose pipes: The hose pipe which will drain the water from the washer will be connected to the drain outlet. Locate the drain outlet, use a screwdriver to loosen the clamp, and pull the drain hose. It will be easy to remove. At this point, you have disconnected hoses, drain pipes, electrical connections, and other outlets. Your washer is now completely disconnected.
- Disconnect the electric code: Finally, check if your washer is still connected to the electric board with the electric code. After disconnecting, secure the code within the washer to avoid any friction while moving.
- Disconnect the gas line supply: Locate the gas supply valve, and turn it in the counterclockwise direction to disconnect the gas line from the dryer. Now remove the hose connected to the gas line.
- Disconnect the vent ducts: Locate the vent ducts from where the ventilation hose enters your home. The ventilator hose prevents the fire from occurring. The clamps secure the ventilator hose. Use cutters to remove clams and pull the ventilator hose. Be careful while disconnecting the vent ducts. Consider hiring professionals.
- Clean the vent ducts: If you see them dirty with an accumulation of debris, consider cleaning them before shifting to the other side of the wall. You can use a vacuum to clean the debris or even cloth. If they are defective, you must replace them with new ones.
- Secure the electric code of the dryer: After unplugging the dryer from the electricity, the dryer’s electric code will flow free; before moving, secure it within the dryer using straps.
- Secure the ventilator hose: It is a large diameter hose; after disconnecting it secure it in the plastic bag and carry it to the other side of the wall.
- Ready to move: Check if everything mentioned above is disconnected to ensure safety.
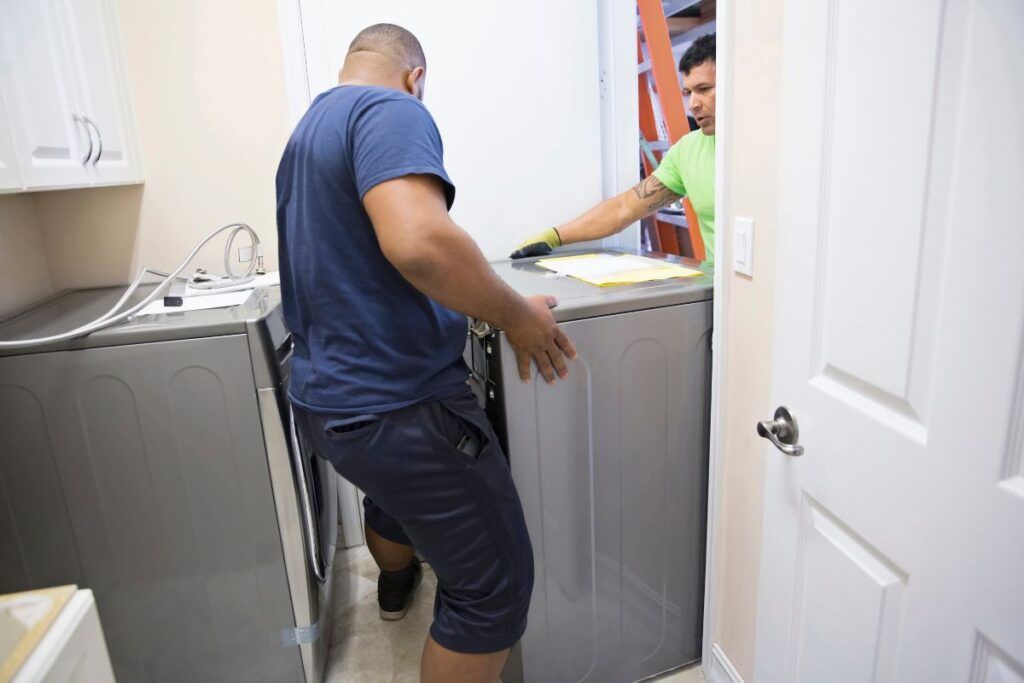
4. Move the washer and the dryer

The next step is to move the disconnected washer and dryer to the other side of the wall where you will install them.
Here is how you can move the washer and dryer.
- Wrap the machines: After disconnecting them, as mentioned earlier, they are ready to wrap. Use plastic material to wrap them, and also you can use blankets to secure them from damage.
- Use the applicant cart: While moving, it’s better to use a]cart or trolley to take the washer and dryer to the new location. Because these machines are too heavy to slide on the floor, they will badly damage the floors.
- Load the machines on the applicant cart: In this stage, take help from your mates or professionals. Let one person hold the cart while the other moves the machines onto the cart.
- Strap the machines well: After loading the machines, to avoid any movement while sliding the cart or trolley, secure the machines with the trolley with straps.
- Move the cart: Now, it is safe to move the cart after making the necessary arrangements. With the help of two people, move the cart or trolly and take it to the other side of the wall.
5. Repair the wall
After disconnecting the washer and the dryer from the old location, you may want to renovate the wall to make it look less messy.
You have to close the gaps with caulk and smoothen the surface.
After smoothing the surface, it will be ready to apply the primer.
Next, paint the surface with the color of the wall.
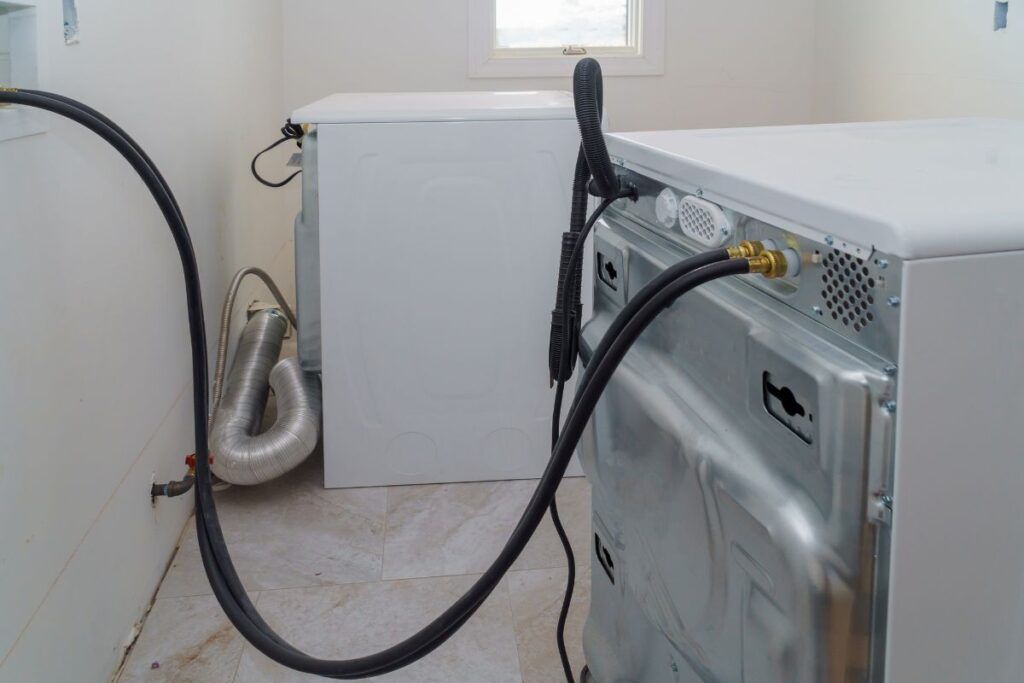
6. Connect the plumbing system
By making the necessary arrangements, you have already installed the plumbing system in the new place.
Now, connect all the pipes and hoses to the washer and the dryer.
7. Connect water hoses and drains

As discussed above, washers have both hot and cold water hoses.
So, you have to connect your washer to both hoses.
Use a hacksaw to cut the part of the pipe originally connected to the hookups in the old location.
Now you have to install a sanitary tee on both hoses.
A Sanitary tee is a “T” shaped pipe through which water flows in the horizontal direction from the lower end of the pipe.
As a next step, you have to seal the pipe with PVC cement to give the pipes a stronghold.
In this stage, the other end of the sanitary tee must face you; now, make the sub-outlet for both hot and cold water lines.
As the last step, disconnect the drain pipe and cut the part which connects to the washer to replace it with a 90-degree elbow.
Remember, the horizontal pipeline must not be short.
It must be as long as a drain hose to connect.
8. Connect to the dryer vent and the gas line
The method to connect the dryer vent is the same as the drain water hoses.
Make sure to follow the same steps to connect the dryer vent, but instead of 90 degrees, the dryer vent must open to as wide as 80 degrees.
You need to connect the gas line if you have a gas dryer.
You must hire a professional to do this work because doing it without the proper knowledge will put you in danger.
9. Connect a new 120-volt box
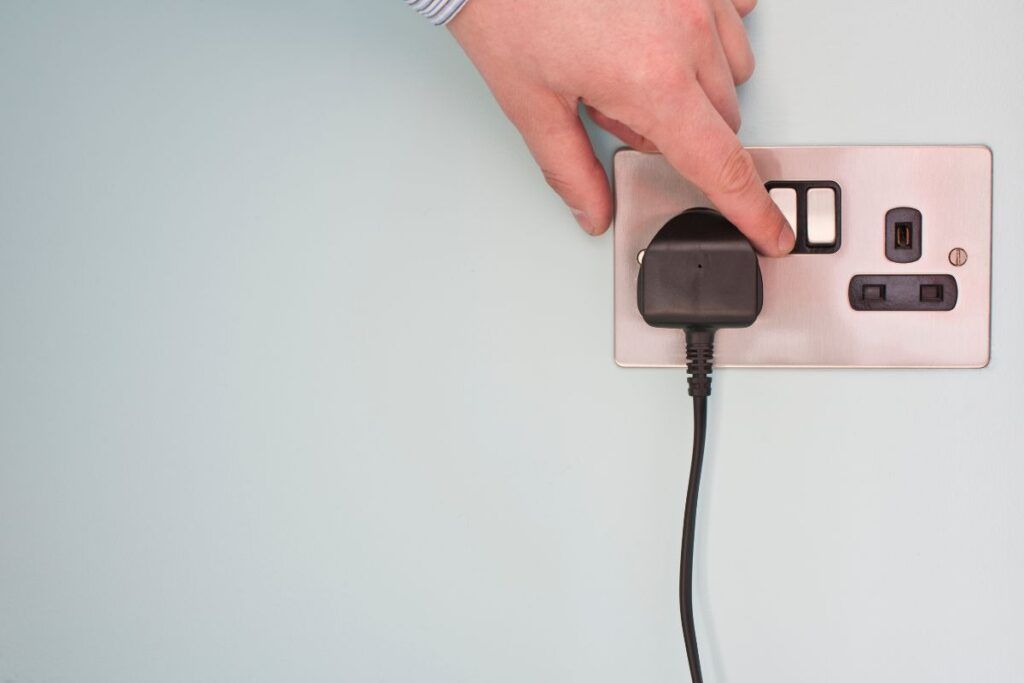
After doing all the plumbing connections, it’s time to make electrical connections.
As discussed earlier, you must have already installed the 120-volt box and now connect the washer and the dryer with the electrical unit by connecting the respective wire.
It is recommended to hire a professional to do these wire connections if you are not familiar with them.
10. Renovate the wall
After making all the electrical and plumbing connections, there will be holes and gaps in the drywall as you move your laundry to the other side of the wall.
Close these gaps and holes to give a complete finish look to your laundry setup.
Close the gaps with the waterproof filler and caulk sealant, then smoothen the surface to paint the wall.
11. Fix the laundry standpipe
As the final step, you have to install the standpipe.
The washer needs a P trap to prevent the leakage of the gas.
Install the P-trap to connect it with the standpipe.
You can easily connect the installed P trap and the standpipe.
After this process, connect the P trap with the drain outlet by securing it with the ring nut.
Connect the standpipe at the lateral end by following the same process.
12. Install the washer and the dryer
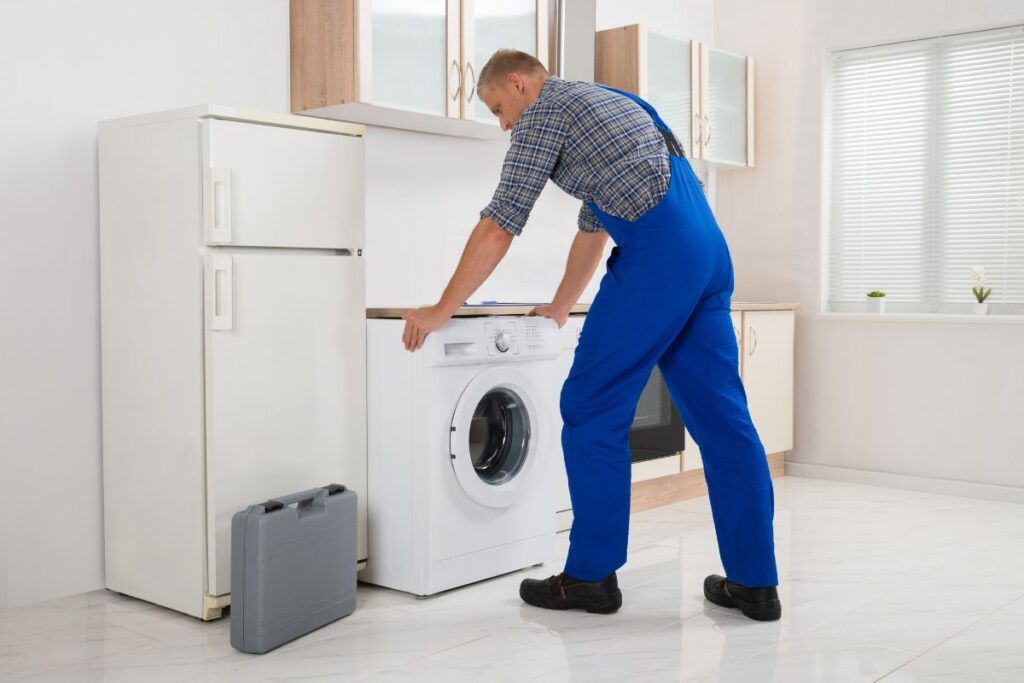
After following all these necessary steps, your washer and dryer are ready to install.
Position them properly, connect the hoses and drain pain with the washer.
Connect the gas line and ventilation hose with the dryer.
Turn on the water supply and gas valves.
Now turn on the electricity after making sure all the connections are made in the right way.
Finally, check for any leaks and malfunctioning electric connections.
Now you are safe to enjoy the new laundry space.
The ideal distance between the washer and drain:
- 2.7 m ( 9 ft ) is the maximum distance between the washer and drain. Ideally, the washer comes with 1.5m(4.9 ft ), but you can extend with 1.2 m long pipes ( 4.9 ft ).
You can use too long pipes, but it can cause the accumulation of dirt and debris.
How do I move the washer and dryer to the garage?
If you wish to make your living space clutter free, you can choose to install your laundry in the garage.
Relocating laundry to the garage will make your home organized.
You can relocate your laundry to the garage by following the steps mentioned above of making necessary arrangements, disconnecting from the old space, and installing a washer and dryer in the garage.
You can eliminate loud noise by relocating your laundry to the garage.
Ensure you undertake all the safety measures while relocating your laundry to the garage.
Also read: How To Move Washer And Dryer To Another Room?
Do you need a permit to move the washer and dryer?
As moving the washer and the dryer wants you to install a water supply, gas line, and 120 volts electric unit, it is a must to get a permit before relocating.
It may depend on the local law of your area.
Get to know about your local laws regarding acquiring a permit.
They will guide you regarding local law if you have hired a professional.
If not, you can consult them regarding the rules and laws.
Final thoughts
Before relocating your washer and dryer, it is important to have a proper plan. You can make the process easy and less expensive with the proper plan.
Make the proper arrangements in the new location before moving the washer and the dryer, as I mentioned in the article.
Ensure the safety measure while relocating the gas dryer. If possible, hire professionals. To avoid trouble, learn about the local laws of your area regarding acquiring permits.
Also read:
Reference: APPLIANCE STANDARDS AWARENESS PROJECT, LG Official Guide, Kenmore User manual.