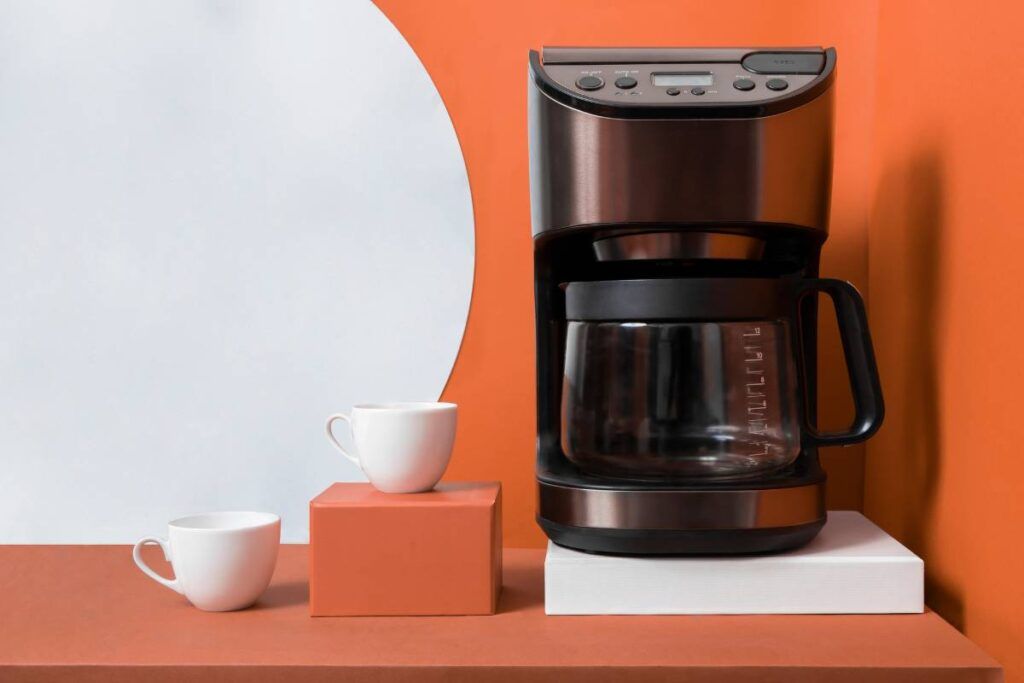
Keurig is the savior in preparing an instant cup of fresh coffee at home when you crave it. But it will be disappointing to confront the Keurig that keeps shutting off when you crave your coffee. If you want to know the causes and steps to fix the issue, you are at the right place.
Your Keurig will keep shutting off if the bottom of the K-cup is unpunctured. In such a case, you need to clean the needles. Check if the magnet in the water reservoir is misaligned. If that is the case, align the magnet manually. If nothing else works, try to reset your Keurig.
In this article, you will understand the common causes and easy steps to fix the issues. You will also know tips to maintain your Keurig at the end of the article. So, keep reading.
Check out our list of top-handpicked products for all your electrical, appliance, and HVAC system needs to keep your home running smoothly.
This post includes some affiliate links.Why does my Keurig keep shutting off? (Fix)
Monday last week, I first encountered my Keurig shutting off frequently while brewing the coffee.
I was in a hurry to go out for important work after coffee, but a Keurig was shutting, and not making coffee ruined my morning.
Are you facing the same struggle with your Keurig?
Do you feel annoyed about not being able to have your fresh cup of coffee at home?
I can understand how it would feel to get up in the morning only to see a Keurig not working as it should.
But worry not!
I have shared the possible causes and steps to fix the issues in Keurig.
You have to figure out the cause of the issue in your Keurig and fix the faults.
Let’s dive in!
1. K-cup unpunctured bottom
K-cup at the bottom not being unpunctured is the most common cause of why a Keurig keeps shutting off.
To understand the issue, let’s get a basic understanding of how Keurig works.
Keurig, unlike other coffee machines, gives customized coffees individually.
K- cups are plastic cups containing coffee with a vacuum seal.
A vacuum seal helps to retain the flavor and freshness of a coffee.
They are sealed with an aluminum cover to prevent moisture from creeping inside the cups.
In the bottom of the k-cups, you can find a filter at the bottom of k-cups to brew the coffee.
These k-cups are kept inside the Keurig to brew the coffee.
The needles in the Keurig puncture the top and the bottom of the k-cup to brew the coffee.
After the needle punctures the top of the k-cup, the Keurig will blow the water into the K-cup, puncturing the bottom cup to pour the coffee into the filter.
In this stage, you can choose the size you want.
If you want a strong coffee, you can choose the small size.
For diluted coffee, you can choose the large size.
Now, the coffee flows through the bottom punctured hole of the cup.
If the bottom cup is not punctured, the coffee won’t pour into the cup, and your Keurig will shut off.
To fix this issue, you must manually take out the Keurig K-cup to puncture the bottom of the K-cup.
You can remove the K-cup from the Keurig and puncture the bottom of the cup.
However, this is not the permanent fix to the issue.
You would have to open the Keurig to check the condition of the needle to fix this issue permanently.
Follow the steps below to fix the issue:
- Open the Keurig to access the holder which holds the K-cup.
- A K-cup is placed inside the holder to brew the coffee. To access the internal parts of the Keurig, you must remove the holder.
- Pull the holder out by releasing the locking tab and clips holding it in place.
- After removing the holder from the Keurig, clean it with soap and hot water to remove the accumulated dirt and debris.
- At the bottom of the holder, you will find a needle that punctures the bottom of the K-cup.
- You can use a paperclip to clean the needle to remove residue coffee grains stuck with the needle. Or you can replace it with a new needle if it is completely damaged.
- Access the top needle and clean it to remove any dirt and coffee residue.
- Now, detach the water tank from the Keurig and unload all the water from it.
- Clean it with soapy water to remove dirt and debris.
- Next, remove the top of the Keurig by unthreading the two screws.
- Remove the screen acting as a filter and clean it with a brush to remove dirt and debris accumulation.
- Reattach the water tank and k-cup holder.
- Reattach the screen to the top of the Keurig.
Other common causes of the unpunctured bottom of the K-cup are misplacing the cups or using the wrong k-cups in the Keurig.
If you are using the wrong K-cups in the Keurig, the needle will try to puncture the cup.
A needle may be broken or bent if the cup is hard to puncture.
2. The magnet in the water reservoir is misaligned

A Keurig has a water reservoir to brew the coffee.
The water reservoir has a magnet to sense the load of water.
If no water is in the reservoir, a magnet senses and refills it to the tank to brew the coffee.
As the coffee maker tends to vibrate during brewing time, there are chances for the magnet to realign.
If the magnet is misaligned, a Keurig won’t sense the water in the tank, resulting in the issue.
To fix this issue, you must realign the magnet manually.
Here is how you can realign the magnet inside the water tank:
- Unplug the Keurig from the electric outlet.
- Locate the water reservoir tank in your Keurig. The location of the Keurig may be according to the model of Keurig. Consider referring to the user manual to find the water reservoir in your Keurig.
- Pull the tank from the Keurig by releasing the retaining clips and locking tabs.
- Usually, water reservoirs are closed with a lid. Remove the lid to access the magnet.
- You can locate the magnet at the bottom of the water tank.
- Put your hands inside the water reservoir to align the magnet.
- Push the magnet from the misaligned position to the aligned position.
- Lock the magnet to its slot and close the water reservoir lid.
- Reattach the water reservoir to the Keurig and secure it with the retaining lock.
- Plug it in and check if the issue is solved.
3. Your Keurig needs cleaning

If your Keurig keeps shutting off, it would be due to the mineral deposit in the Keurig.
If there is mineral and dirt accumulation in the Keurig, it will affect its normal functionality.
To fix this issue, you must descale your Keurig.
There are different cleaning methods for the Keurig based on when you are cleaning it.
They are:
- Weekly
- Once every two months
- Once every six months
Here is how you can clean your Keurig weekly:
- Unplug the Keurig from the electric outlet.
- Detach all the removable parts. You can remove the water reservoir, k-cup, lid, and tray.
- As you use Keurig frequently, these parts get clogged with coffee residue and sticky dirt. So, cleaning all the removable parts once a week is important.
- Prepare hot water, add a cleaning solution to the bowl, and pour the hot water into it.
- Run soapy water into a k-cup, lid, water reservoir, and tray.
- Use a brush to remove any excess dirt from the surface.
- After cleaning all the parts, use a towel to dry them.
- Now, clean the exterior of the Keurig with a cotton cloth.
- Soak the cloth in warm soapy water and remove dirt and dust from the exterior of the Keurig.
- Now, reattach the water reservoir by locking it in a slot.
- Reattach the k-cup and lid.
- Reattach the tray and plug in the Keurig.
Start brewing the coffee and inspect if the issue is solved.
If not, it must be due to another fault.
Continue reading to find the other causes and fixes.
Here is how you can clean once every two months:
You must clean the water filter, filter holder, and K-cup holders every two months to avoid issues in your Keurig.
- Unplug the Keurig from the electric outlet and secure the power code from getting damaged during the cleaning process.
- Remove the k-cup holder from the Keurig and wash it with soapy water.
- Remove the water filters and soak them for 15 minutes in warm soapy water. Clean them with a brush to remove the excess dirt and debris accumulation.
- Remove the water filter holder from the Keurig by releasing the locking tabs. Soak them in soapy water and clean them with a brush.
- Reattach the filters and holders to the Keurig.
- Plug in the device and check if the issue is solved.
Here is how you can clean every six months:
In this process, you need to clean the interior parts of the Keurig.
- Open the water reservoir of the Keurig and fill it with the descaling solution until it is half-filled. You can also use vinegar to descale the machine. And after filling another half of the reservoir with water.
- Start the brewing in the Keurig without placing the k-cup. To collect the cleaning solution, place a cup on the tray.
- Brew by selecting the large-size option in the Keurig control board.
- Repeat the process until all the cleaning solution is emptied into the water reservoir.
- You can confirm it when you see an add water remainder in the control panel.
- After completing the brewing process with the cleaning solution, fill the reservoir with fresh water to remove the remaining cleaning solution residue in the Keurig.
- After filling the fresh water in the water reservoir, don’t place the k-cups and brew until the water reservoir is empty.
Let the Keurig sit undisturbed for the next 30 minutes to dry.
Plug in the Keurig and enjoy your fresh cup of coffee.
4. Reset your Keurig

Your Keurig may shut off due to glitches in the control board and the electric components of the Keurig.
In such a case, you must reset the Keurig.
Here is how you can reset your Keurig:
- Unplug the machine from the electric outlet.
- Let the machine sit for 5 to 10 minutes.
- Plug it in again and switch on the machine.
The simple reset is complete and begins the brewing cycle to check the issue is solved.
You must do the hard reset if this doesn’t solve the issue.
Here is how you can do the hard reset:
You can do the hard reset by pressing the two buttons in the Keurig simultaneously.
- Plug in the Keurig.
- Locate the small cup and medium cup buttons in the Keurig. Press and hold them for 3 seconds. And release them simultaneously.
- Press the menu option in Keurig immediately after the above step.
- Now, you can see the clock displaying 6:09.
- Next, again press and hold the menu option.
- You can see the clock displaying 0:00.
- Press and hold the medium cup button; when you are still holding it, press the menu option and release it immediately.
- Now press the small cup button while you are still pressing the medium cup button.
- Let the Keurig sit for 40 to 50 minutes unplugged.
- Plug it in after 50 minutes.
If the control panel glitches are causing these issues, doing the hard reset will solve the issues.
Also read: 8 Reasons Your Keurig Is Flashing Lights (+Fix)
5. Power cord issues
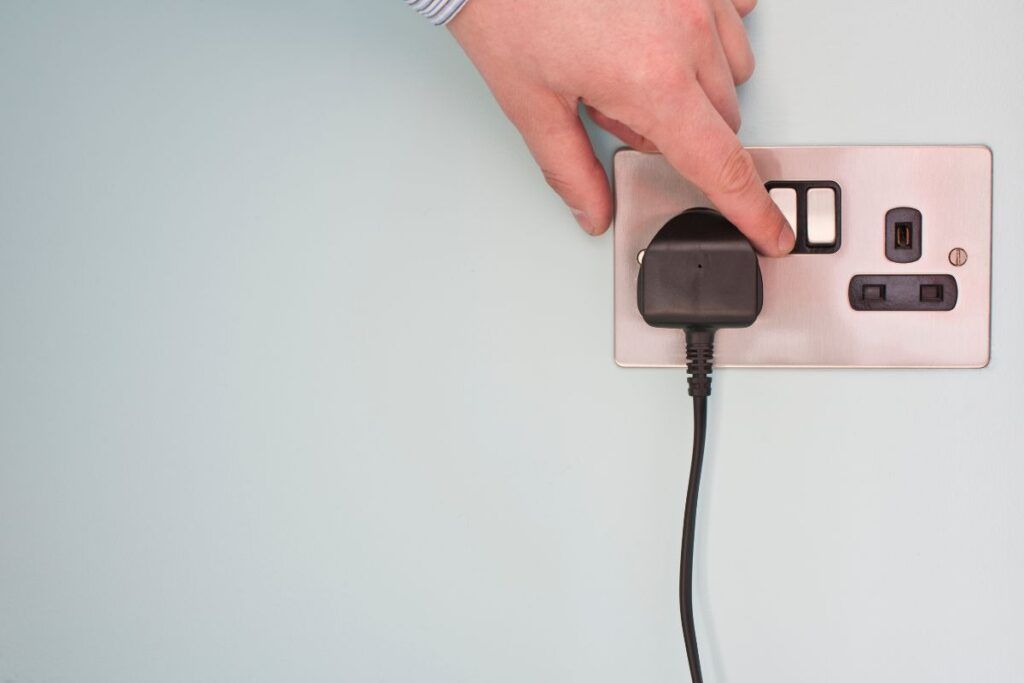
If you have tried all the above fixes and your Keurig is still causing issues, it must be due to the irregular power supply.
You can confirm this by checking the condition of the power cord.
If it is damaged, it may not supply enough power to the Keurig to brew a coffee.
In such a case, you must replace it with the new one.
You can also check if there are issues with the wall outlet.
You can replace the power cord by removing the bottom panel of the Keurig.
Release the retaining clips securing the faulty power code. Replace it with the new one.
Tips on maintaining Keurig to prevent it from shutting off
Like any other electrical device, it is necessary to take proper care of your Keurig to prevent it from getting faulty.
Here are some tips on proper maintenance of the Keurig:
- The first and foremost important step in taking proper care of Keurig is to clean it regularly. Follow the steps mentioned above to clean your Keurig frequently.
- Water cartridge refills help remove the chlorine content from the water. It is extremely important if you use hard water to brew a coffee. Changing the water cartridge refill once every 6 to 7 months is recommended.
- Rinse your Keurig with the rinse pad once a week, as Keurig is multi-functional and can brew coffee, tea, chocolate drinks, and much more. Rinsing it with the rinse pod will help avoid a blending taste when you brew a coffee after a tea or chocolate.
How long does Keurig last?
The question comes to every one of our minds while encountering issues in Keurig.
When you see a Keurig shutting off, you don’t want to replace it immediately.
A Keurig can last up to 3 to 5 years. However, if you maintain it well, you can expand its life span.
Sometimes, a Keurig can get faulty within 5 years if you are not maintaining it properly, and you can brew more frequently.
How do you know if your Keurig is going bad?
You can confirm your Keurig is getting faulty by observing the following signs.
- Your Keurig is taking too much time to turn on.
- Your Keurig is taking longer than usual to brew one cup of coffee.
- Your Keurig is having trouble dispensing water from the reservoir.
- Your Keurig is not heating and keeps shutting off in the middle.
- Your Keurig is indicating ADD WATER signal in the control panel, even if there is sufficient water in the tank.
- The descale light in your Keurig keeps blinking.
- There is leakage in the Keurig while you are brewing the coffee.
- Your coffee is brewing bitter coffee.
These are the visible signs of your Keurig getting faulty.
In such cases, you must take immediate steps to fix the issues.
What happens if you don’t clean your Keurig?

If you don’t clean your Keurig regularly, there will be mold formation in the Keurig.
If there is mold formation, these will release toxins.
If you brew the coffee in such conditions, you will get sick and cause serious health issues.
And also, internal parts of the Keurig will start getting faulty due to the clogs of the dirt and debris.
Thus, a Keurig will not be efficient in brewing coffee.
Final thoughts
A Keurig is a frequently used electrical appliance to brew your favorite coffee or other drinks. So, taking proper care is crucial to avoid faults and failings. If your Keurig is shutting off frequently, it indicates certain faults.
It may happen when the bottom of the K-cup is not punctured. In that case, a coffee can drip into the cup, and the Keurig will shut off. Other common causes include magnets getting misaligned or power code issues. Follow the steps mentioned in the article to fix the issue.
While these are common, there are other issues, including control panel failure, thermal fuse failure, and heating element failures. These rarely occur in Keurig. In such cases, you must replace the faulty parts. You can hire a professional to replace the faulty parts in the Keurig.
Reference: Keurig Official Manual.