Over-the-range microwaves are the best choice for saving countertop space for other utilities. If you don’t have the cabinet and wonder if there are other ways to install an over-the-range microwave, you are at the right place. Let’s find out the alternatives.
There are three ways to install an over-the-range microwave without a cabinet. They are-
- Wall mounting.
- Ceiling mounting.
- Bracket and shelving.
It also involves installing the vent and grounding the microwave.
In this article, you will understand the step-by-step process of installing an over-the-range microwave, and you will also learn about the alternative option for installing an over-the-range microwave. So, keep reading.
Check out our list of top-handpicked products for all your electrical, appliance, and HVAC system needs to keep your home running smoothly.
This post includes some affiliate links.Understanding the Basics of Over-the-Range Microwave Installation
Microwaves have become an essential appliance in the household.
There are different varieties of microwaves with different sizes.
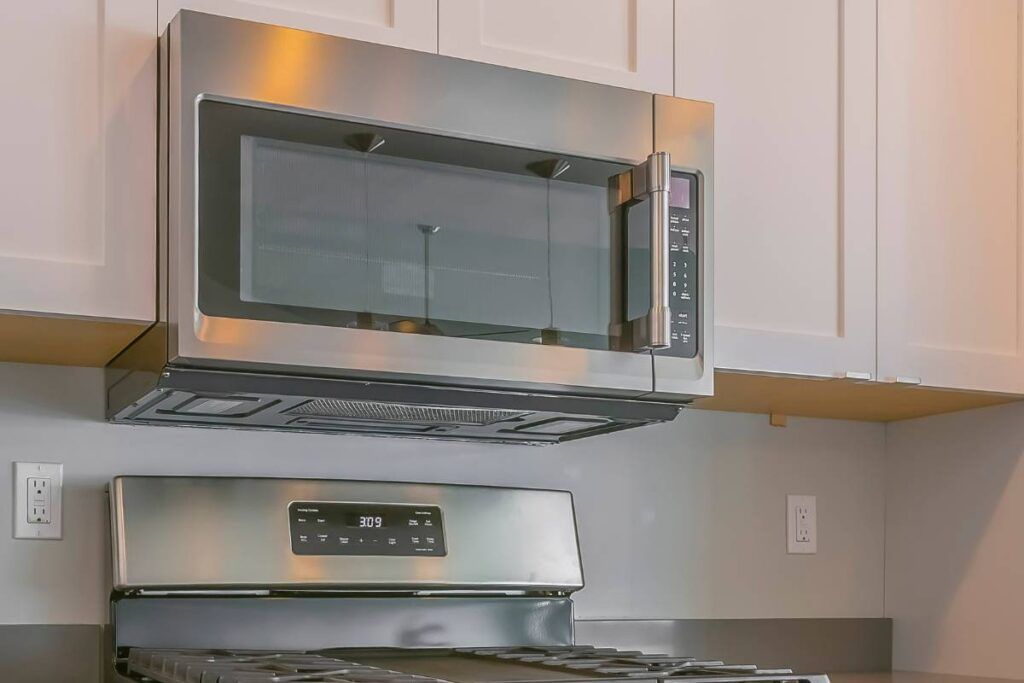
Over-the-range microwaves are one of the varieties of microwaves which is the best choice to save space on the countertop for food preparations.
I recently installed an over-the-range microwave in my kitchen, and I know exactly what it takes to install it without the cabinet.
I thought of sharing the exact steps and safety precautions I followed while installing the Over-the-range microwave.
Let’s start by understanding the basics of installing the Over-the-range microwave.
The importance of following manufacturer instructions:
When you buy a new microwave, it comes with the manufacturer’s instructions to be followed while installing an over-the-range microwave.
Buying a new microwave brings excitement, and we are often tempted to jump straight on the installation without giving importance to the manufacturer’s instructions.
Here are the benefits of following the manufacturer’s instructions:
- Manufacturer instructions contain a step-by-step process to install a microwave. Following the instructions will ensure the proper installation, and one can avoid potential hazards due to improper installation.
- If the appliance is damaged during the installation, you cannot claim the warranty from the manufacturer. Following the manufacturer’s guide will prevent damage to the appliance and ensure safe installation.
- You can improve the functionality of the microwave when you follow the guide’s instructions. You can find precise instructions in the guide about the space and ventilation requirements of the microwave. It also contains precautions you will need to take to avoid overheating.
- Manufacturer instructions also tell how to avoid gaps and positioning mistakes while installing a microwave. Following these instructions will ensure that the microwave is fitted perfectly, adding aesthetics to your kitchen.
Understanding the requirements for mounting an over-the-range microwave:
As the microwave is a heavy appliance, it is not advised to do the installation alone.
It would help if you had one assisting you during the installation process.
You will need the tools and equipment required to do the installation.
You must decide the space where you are going to install the microwave.
You must also check if there is an electrical outlet near the space where you decided to install your new microwave.
The electric outlet must be capable of handling the power requirement of the microwave.
A microwave requires 120 v and 20-amp steady flow of electricity for its efficient function.
Also, you will need to install a vent that runs out of the house’s exterior wall.
Install a vent by following the manufacturer’s instructions.
Installing a vent helps to prevent overheating issues in the over-the-range microwave.
Once you have chosen the location to install your over-the-range microwave, check if the location supports the weight of the microwave.
It is a crucial step as it can pose hazards if not considered.
Safety tips for installing an over-the-range microwave
It is important to take safety measures, especially if installing the microwave yourself, without hiring professionals.
Below are the safety precautions for you to follow while installing an over-the-range microwave:
- Read the safety precautions and warning information in the manufacturer’s guide. Follow all the safety precautions in the guide, and also ensure you pay attention to the warning information.
- Turn off the circuit breaker to avoid electrical hazards when installing the microwave.
- As installing the microwave is a time-consuming procedure, you must have all the tools ready to do the installation to save your time and increase the efficiency of installation. It would be best if you did not use the wrong tool, which will damage the appliance and also may cause hazards. You may need a ladder if you install the microwave on the wall. Keep a ladder ready before starting the process.
- Using a suds finder, find the suds in the wall. You must install the brackets of the microwave in the suds instead of installing them directly into the wall. After locating the studs in the wall, mark the location with pencils.
- Note the maximum weight load a mounting bracket can handle. Overloading it will cause imbalance and result in the microwave’s falling. While attaching the microwave to the mounting bracket, get help from your assistant to hold the microwave.
- Ventilation prevents overheating in the microwave. While installing it, ensure you place it in a well-ventilated area because a lack of ventilation may result in fire hazards.
Ways to install Over-the-Range Microwave without a cabinet
1. Wall mounting
If you want a streamlined look for your kitchen, you can use wall mounting options for installing an over-the-range microwave.
If you have planned to install your over-the-range microwave on the wall, you must buy a specific microwave that can be installed on the wall.
Install the mounting bracket on the wall and place the microwave on it.
Make sure the microwave gets enough ventilation to avoid fire hazards.
2. Ceiling mounting
It is another adoption to install an over-the-range microwave.
When you install an over-the-range microwave in the ceiling, you must buy it with the ceiling installation kit.
Installing the microwave on the ceiling will involve running the vent line through the ceiling.
You must plan the installation thoroughly before beginning the process.
3. Bracket and shelving

Brackets and shelving are the convenient and safer option for mounting your over-the-range microwave.
The main purpose of the brackets and shelving option is to provide support for the microwave while placing it over the range.
You can choose either brackets or shelves to mount your microwave. Also, you can use both brackets and shelving to support the microwave.
Before installing the brackets, decide where to install your over-the-range microwave and find the studs to drill holes for hanging the bracket and shelves.
Once finalizing the area, mount the bracket and drill it with screws and bolts.
Place the microwave and secure it with the hooks in the bracket.
If you choose the shelving option to mount your microwave, you don’t want to drill the area.
Attach the shelves and place your over-the-range microwave above it.
Finally, check if the bracket and shelves are strong enough to withstand the weight of the microwave.
Now, you are ready to use your over-the-range microwave.
DIY Installation of Over-the-Range Microwaves
With time, patience, and the required technical knowledge to install an over-the-range microwave, you can proceed with the DIY repair instead of hiring a professional.
Doing it yourself will save you labor costs, and you will feel accomplished at the end of the installation, as I did while installing the microwave in my kitchen.
Tools and materials needed for installation
Here is a list of tools and equipment needed to install an over-the-range microwave.
Tape
The tape will be useful to measure if there is enough space for the microwave in the mounting bracket. You can measure the distance between the brackets in the microwave and check if it fits the mounting bracket.
Screwdriver
A screwdriver is necessary to attach the mounting bracket to the wall and the microwave to the mounting bracket.
Stud finder
You must not attach the mounting brackets directly to the wall. So, you can use a stud finder to locate the stud in the wall to attach the mounting bracket.
Wire stripper
A wire stripper will be useful to strip the end of the wire to connect it to the electrical outlet.
Socket wrench
The vent can be found secured on the top of an over-the-range microwave. You can use a socket wrench to loosen the bolt securing it.
Pencil
You can use a pencil to make the location of the stud, and you can also mark a location where you want to drill the holes.
Drill
A drill is useful for making holes in the wall to install a mounting bracket, and it is also useful when installing a vent duct.
Level
A level is used to check if the microwave is placed on a leveled surface.
After installing a microwave, use a level check if the microwave is placed on a leveled surface.
Step-by-step instructions for installing an over-the-range microwave without a cabinet

Here are the easy steps to follow while installing an over-the-range microwave without the cabinet.
1. Take out the microwave from the package
Remove the package from the microwave using a sharp blade.
After removing the package, place a cardboard on the countertop to prevent it from getting scratched.
With the help of your assistant, lift the microwave from the package and place it on the cardboard.
A package of the microwave unit will contain mounting brackets, templates, bolts, and screws to use while installing the unit.
Mounting brackets are made of metals, looking like a rectangular frame.
And you can find two templates, the upper cabinet, and the back template.
2. Prepare the area
The over-the-range microwave must be placed 30 inches above the stovetop.
And an electrical outlet must be accessible near where you are installing the microwave.
Keeping these two factors in mind, you must prepare a suitable and comfortable place to mount the microwave.
Measure the distance between the area and the stovetop and mark the central area to place the microwave.
After deciding the place, stick the template in the package to the wall and stick it with the tape.
Now, using a pencil, highlight the frame of the template on the wall. And if there are any holes, drill them using a drilling machine.
3. Find the studs
Over-the-range microwaves are heavy appliances.
Hanging these heavy microwaves to the wall directly will cause danger as the drywall will not be capable of withstanding the heaviness of the microwave.
So, it would be best if you located the studs in the wall.
Studs are wooden frames placed at a distance of 16 to 24 inches in the wall.
They are strong and thick to hold a heavy microwave.
You can use a stud finder to locate the studs in the wall.
Another easy way is to locate the electric outlets and measure the distance to find studs in the wall.
Once you have found the first stud, measure 16 to 24 inches to find the next one.
4. Adding an extra shelf above the microwave:
Adding an extra shelf above the microwave will support the microwave’s mounting bracket.
It will ensure that the microwave stands in place for many years without causing any issues.
It is not a compulsion to add the extra shelf above the microwave, but adding it will ensure support for the microwave.
5. Installing the mounting bracket
In step 2, you have marked the lines based on the template.
Check if the lines match the base of the mounting bracket.
Now, place the mounting bracket in the wall against these lines and secure it with the bolts by drilling it into the wall.
Follow the pencil mark you made earlier to drill the screws and bolts.
If additional holes exist in the bracket, make a pencil and drill the area to secure the bracket with screws.
Make sure the new holes are made in the studs to prevent danger.
Place the mounting bracket against the wall and secure it with screws and bolts.
And secure the toggle bolt at the center of the mounting bracket to ensure safety.
6. Fix the microwave

Lift the microwave with the help of your assistant.
Place the microwave on the mounting bracket and secure it with the hooks at the front and back side of the mounting bracket.
Run the power cord to the electrical outlet, and plug it into it.
If holes are in the upper shelf, drill them to ensure they are secure.
7. Check the microwave
After installing the microwave, check if the mounting brackets are strong and install the vent.
And ground the microwave to prevent electrical hazards.
Troubleshooting tips for common installation issues
Installing an over-the-range microwave will help to save space on the countertop. It is important to install it in the right way.
Here are some common mistakes to avoid while installing an over-the-range microwave:
Not checking the weight capacity
Before buying the microwave, you must know how much weight your wall can handle.
Suppose you install the microwave without knowing the weight capacity of your wall.
In that case, there are chances of your microwave falling off.
So, buy a microwave which will suit your wall.
Ignoring the templates provided
People often ignore templates that come with over-the-range microwaves.
Templates mark the holes and lines to make the microwave installation easy.
So, you must use a template to install a microwave.
Not installing the mounting bracket properly
You must read the manufacturer’s instructions before installing the mounting bracket.
Not installing the mounting bracket in the right wall will cause danger to the appliance as well as to humans operating it.,
Make necessary holes and drill them tight to secure the mounting bracket to the wall.
Not giving importance to venting.
Over-the-range microwaves come with a venting system.
It helps to remove the steam and smoke from the microwave to expel it.
If the vent is not installed properly, it may cause fire hazards in the kitchen.
And it also causes health issues if exposed to hot steam regularly.
Forgetting to ground the microwave
After installing the microwave, you should ground the microwave to avoid electrical hazards.
Hiring a Professional for Over-the-Range Microwave Installation
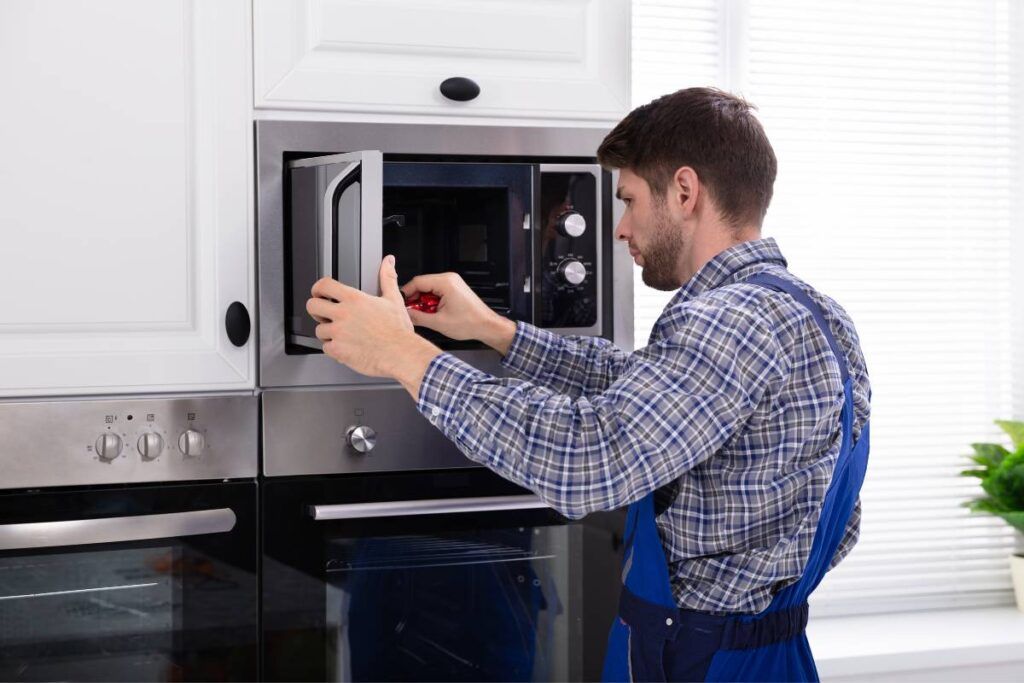
If you are not experienced in installing an over-the-range microwave, you can hire a professional.
The benefits of hiring a professional
Hiring a professional can save you the time and effort needed to install the microwave.
When professionals do the installation, there will be fewer chances of mistakes and failings.
They do the installation efficiently, increasing the microwave’s functionality.
What questions should you ask a professional before hiring them for installation?
Before hiring professionals, you must ask them questions to see if they fit you.
Here are the questions you can ask them:
- How many years of experience do they have in installing an over-the-range microwave?
- Do you have a license to do professional work?
- What type of mounting bracket will you use?
- Does your service include electrical and vending repairs?
- Will you provide any warranty for your service?
- What is your quote to do the entire installation process?
- How long will it take to complete the installation?
Factors to consider when choosing a professional for installation
You will need to spend a significant amount of money on labor costs.
So it would be best to make an informed decision while hiring professionals.
Here are the factors to consider while hiring professionals:
- Experience.
- Credentials.
- Quality of work.
- Cost of their service.
- Safety and
- Time and availability.
Final thoughts
Installing an over-the-range microwave without the cabinet is possible. You can easily install the microwave if you have the necessary tools and technical knowledge. There are two alternative options to install an over-the-range microwave without the cabinet.
You can mount the microwave on the wall and the ceiling. While installing the range microwave oven, ensure to follow the instructions given in the manufacturer’s guide. The guide will include the step-by-step process to install the microwave, and safety precautions tips will be included.
Follow the steps mentioned in the article to install an over-the-range microwave on the mounting brackets. However, if you don’t have time and professional experience, you must consider hiring a professional to do the installation.
How much does it cost to install an over-the-range microwave?
The labor cost of installing an over-the-range microwave ranges from $100 to $ 300. If you install the new duct, the additional cost may go up from $200 to $600.
What is the average life of an over-the-range microwave?
An over-the-range microwave lasts from 10 to 15 years. However, you can extend its lifespan by taking proper care of it.
Reference link: Microwave Wikipedia.