If you are using fluorescent lights for a long time, it is common to notice them go dim in the long run. And you are at the right place if you are looking to fix your dim fluorescent lights.
When your fluorescent lights are dim, check if there is an adequate power supply to your fluorescent lights. If there are issues in the power supply, fix them with the help of professionals. Another significant cause of dim lights is bad ballast. Replace it with a new one.
In this article, you will understand common causes and steps to fix dim fluorescent lights. So, keep reading.

Check out our list of top-handpicked products for all your electrical, appliance, and HVAC system needs to keep your home running smoothly.
This post includes some affiliate links.How do fluorescent lights work?
Fluorescent lights are energy efficient and last a long time.
Fluorescent lights contain low-pressure mercury discharge tubes.
These lamps use a component called fluorescence to ignite lights.
The mercury gas ignites the electricity passed to the fluorescent lights, and the phosphorus coating is developed inside the tube to produce light.
4 ways to fix dim fluorescent lights
Fluorescent lights are a cost-effective and energy-saving option.
If your fluorescent lights are dim, they will reduce the elegance of your home.
Here are common causes and steps to fix your dim fluorescent lights.
1. Check the power supply to your fluorescent light
If your fluorescent lights are dim, one of the significant causes would be an inadequate power supply to your fluorescent lights.
You must check the power supply to fix this issue.
Follow the steps below to check the voltage supply to your fluorescent lights:
- Disconnect the power supply to the circuit that provides power to your fluorescent lights.
- Next, you need to detach the bulb from the fixture. To do so, rotate the bulb anticlockwise in the fixture to remove it completely. You can see that this bulb is fixed in place with the help of tombstones to make it easy for the electricity to transfer to the bulb when it is powered on.
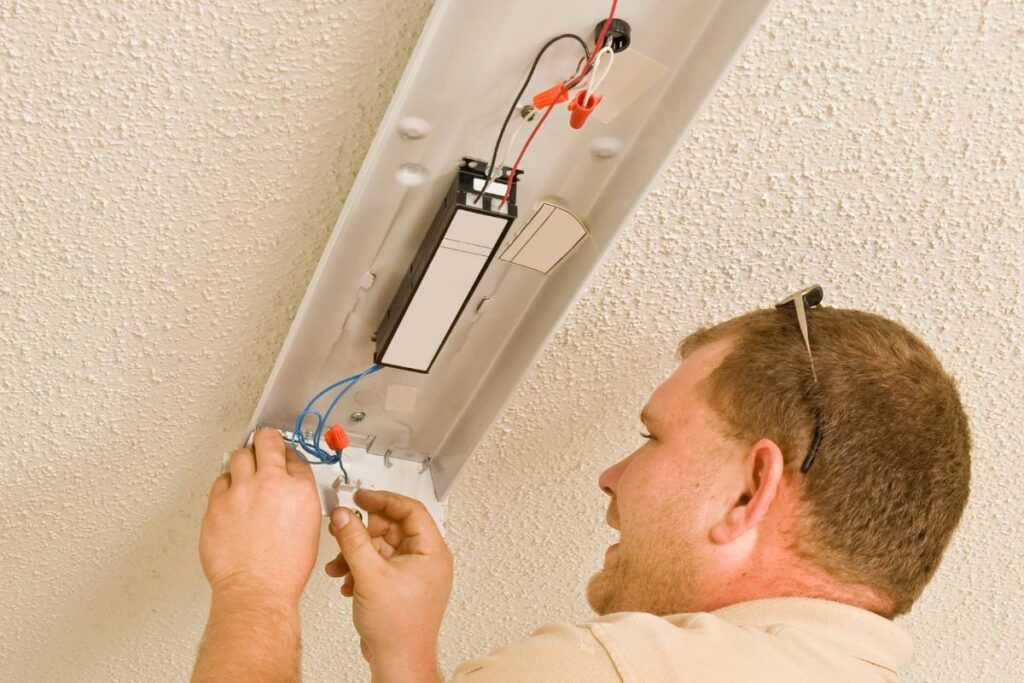
- To check if the power supply is adequate, you must check the ballast. Detach the cover from the ballast by unthreading two screws securing it. You can also see blue and white wires connected with the ballast to attach it to the fixture.
- Now, it’s time to check the ballast with the multimeter. Turn on the multimeter, and take the first probe to the white wire and the second one with the colored wire to check the reading in the multimeter. The multimeter must show continuity if there is an adequate power supply. If it does show any continuity, your fluorescent light is not getting an adequate power supply. You must check the power source and also replace the ballast.
- You must also check the working status of the tombstone wires connecting the fixture. Unthread the screws securing the tombstone and access the wires. Take the first probe of the multimeter to touch the power wire and the second to the neutral wire. If there is no continuity, there are issues with the tombstone wires, which you should replace.
If all these are not issues in your case, check the power source and if it supplies enough power to your fluorescent lights.
If there is no adequate power supply, seek help from professionals to regulate the smooth power supply to your fluorescent lights.
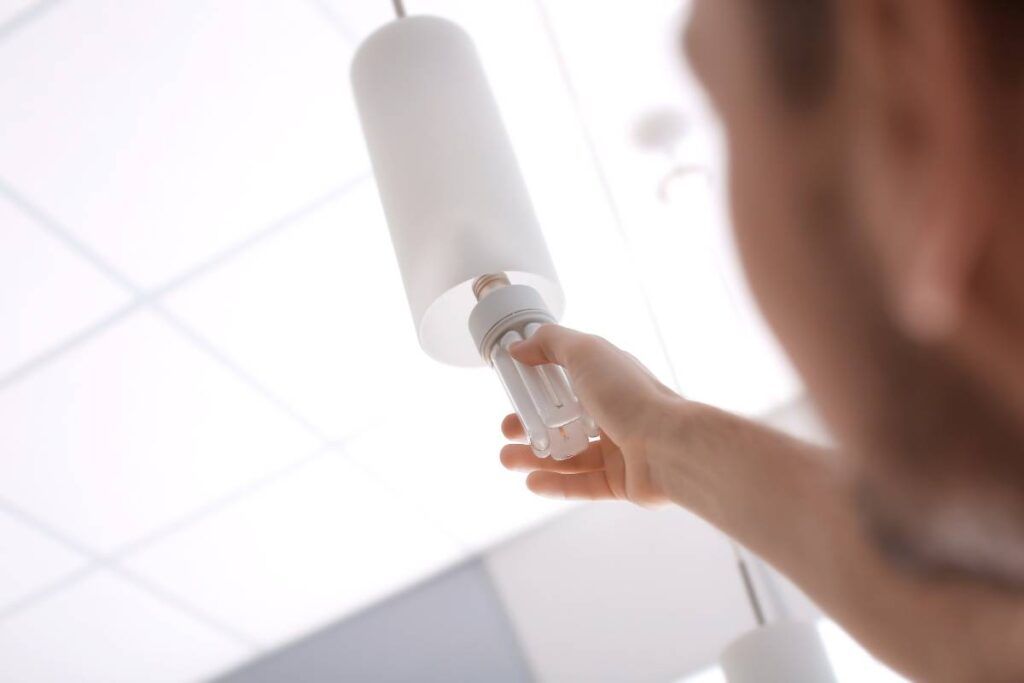
2. Replace the faulty bulb inside your fluorescent light

If you have checked your power supply and still your fluorescent lights are dim, you must check the working condition of the bulb.
If the bulb is faulty, your fluorescent light may not glow brightly.
In such a case, you must replace the bulb.
Follow the steps below to check the working condition of the bulb in your fluorescent tube:
- The first step in checking the working condition of the bulb is to inspect if there is darkness at the side of the bulbs. If you are using the bulb for the longest time, there will be darkness at the side of the bulb. It indicates that the bulb is dying and you must replace it.
- The next step is to check the pin at the side of the bulbs. If the pins are bent, you can use pliers to straighten them. If the pins are broken, you must replace the entire bulb.
- You can also check the continuity of the bulb with the multimeter. Touch the probe of the multimeter to the pins in the bulb. If there is no continuity shown, you must replace the bulb.
- Check the starters of the bulb. Starters are small cylindrical parts that can only be found in older fluorescent tubes. These starters help to stimulate the gas to light the bulb. If you are using an older fluorescent bulb, replace the starters.
3. Check the working condition of the ballast

The ballast is an important component of fluorescent lights that is located inside it to supply enough voltage to ignite the light.
It also regulates the voltage supply to the fluorescent light.
If the ballast is faulty, you must replace it with a new one.
Causes of ballast failure in fluorescent lights:
Ballast in fluorescent lights fails due to the heat and excess moisture in the environment.
It also became faulty due to the loose wiring in the fluorescent bulb.
Here are some of the signs of faulty ballast:
If you observe these common signs mentioned below in your fluorescent lights, it indicates the faulty ballast.
Low light: The first indication of a faulty ballast is when your fluorescent lights are dim after regulating the adequate power supply and replacing the bulb if it is faulty.
In such a scenario, you must check the working condition of the ballast and replace it as soon as possible.
It is impossible to repair the ballast, and the only solution is to replace it completely.
Constant flickering: If the fluorescent lights are flickering continuously, it may annoy the housemates, which is also a sign of faulty ballast.
As soon as you observe the flickering in your fluorescent light, check the ballast for replacement.
Buzzing sound from the lights: If there is unusual noise from your fluorescent lights, it indicates faults, including faulty ballast.
Delay in blowing of light: The ballast provides the required voltage to blow the fluorescent light.
It may be due to the faulty ballast if you have switched on the light and it takes time to blow.
You must check these signs with the multimeter if you notice them in your fluorescent light.
Follow the steps below to check the ballast with the multimeter:
- Turn off the power circuit breaker connected to the fluorescent light you are working on.
- Next, you need to detach the fluorescent light from the fixture. Rotate the light anticlockwise or slide it out based on the model of your fluorescent light.
- Now, you need to detach the ballast from the fluorescent lights. The method of removing the ballast differs based on the model of your lights. If your lights are circular-shaped, you can easily unplug them from the light by twisting them in the left direction. If you have a U-shaped fluorescent bulb, you need to remove the bulb from the spring to detach the ballast from the holder.
- If the ballast in your fluorescent lights is covered with the outer covering, remove it. Inspect the ballast for any sign of burning, leaking, or swelling. If you observe any of these signs, you must replace the ballast even before testing with the multimeter. If not, you can proceed to the next step.
- Set the multimeter to the ohm. Touch the first probe of the multimeter to the white wire and the second one with the red or blue wires attached to the ballast.
- If no continuity is shown in the multimeter, It indicates the faulty ballast. In such a case, you must replace the faulty ballast with the new one.
If you find the reason for the dim fluorescent lights is faulty ballast, you must replace them immediately to enjoy the bright light.
Before starting the replacement process, purchase the right ballast to suit your fluorescent light.
In such a scenario, you can consult a professional to choose the right ballast with the identical wire configuration and voltage capacity.
- Begin by disconnecting the power supply to the lights you will work on.
- If your fluorescent light fixtures are covered with a plastic outer covering, detach them from the fixture. Release it from the locking tabs using your hands. Gently slide it to the right to remove it from the fixture.
- Next, detach the fluorescent bulbs from the fixture. Rotate the bulb in the counterclockwise direction to remove it from the fixture. While removing the bulbs, inspect the electrodes attached to each side of the tube; if they are faulty, replace the electrodes or the bulbs.
- Now, remove the cover plate securing the ballast in place. The locking tabs at each side usually secure this cover. Using pliers, release the locking tabs to slide down the cover from the fixture.
- Now, you can access the ballast and its wire connections. Before proceeding, using a voltage tester, ensure no current flow to the ballast. You can see power wires in white and black color. In addition to these wires, more wires will be connected to the ballast. Before removing the ballast, consider taking photos of the wire configurations to make it easy for you when you replace the new ballast.
- Disconnect all the wire connections from the ballast.
- Detach the ballast from the fixture by removing the screws securing the ballast to the fixture.
- Replace the new ballast and secure it with the screws you removed. Reconnect all the wires by referring to the digital photo you took.
- Reinstall the ballast cover and secure it with the screws.
- Reinstall the bulb and the plastic cover to the fixture of the fluorescent lights.
- Turn on the circuit breaker to ensure the power supply to the bulb. And check if your fluorescent lights are bright.
4. Replace your fluorescent light
The average lifetime of fluorescent bulbs is about 20,000 hours.
If your fluorescent lights are older, it would be difficult to fix the issues.
In such a case, you must replace the entire fluorescent light.
How can you tell if the ballast is bad?
If your fluorescent lights are flickering continuously and if the light is dim, most probably the ballast went bad, and you have to replace it.
A bad ballast will also cause unusual buzzing sounds when the light is switched on.
Other common issues with fluorescent lights
Apart from the dim lights, other common issues with fluorescent lights are:
Fluorescent lights are not starting.
If your fluorescent lights are not starting, it may be due to the faulty starter switch, choke, or loose holder.
You can fix these issues by replacing the faulty parts.
Or you can try rotating the fluorescent light to 90° and inspect the wire connection and holders.
Fluorescent lights switch on and off automatically.
If your fluorescent lights switch on and off immediately, it may be due to the low voltage supply, wrong electric circuit connections, and faulty fluorescent tubes.
You can fix this issue by working on regulating the smooth circuit connections.
Replace the faulty fluorescent tubes to bring your lights to working condition.
The end of the fluorescent tube keeps blowing.
These issues occur when there are faults in the starter switch.
Inspect the starter switch to check if it is short-circuited.
In such a case, replace the starter switch with the new one.
The appearance of dark streaks along the light
If you notice dark streaks along your fluorescent streaks, it is due to the mercury globules.
To fix this issue, turn your fluorescent light to 180°. Doing this will solve the issue most of the time.
Loud noise
If there is unusual noise in your fluorescent lights, it is because of two causes.
One is bad ballast.
If that’s causing the issue, you can solve it by replacing the faulty ballast.
Another important cause is excessively vibrating iron core sheets in the choke.
You can fix this issue by tightening the iron core of the sheets or replacing the entire choke of your fluorescent light.
Final thoughts
Fluorescent lights are the most commonly used in both households and office spaces. And it is common for fluorescent lights to go dim for several reasons.
One of the important causes would be power supply issues. Check if there is an adequate power supply to the lights. Consider seeking help from professionals to solve the power supply issues.
Another common cause of dim fluorescent lights is bad ballast. Ballast supplies the required voltage for the fluorescent light to blow. If they are faulty, replace them with new ballast. Follow the steps mentioned in the article to fix the dim fluorescent lights.
Do fluorescent bulbs lose brightness?
In the case of using fluorescent lights for more than 8 years, their brightness will reduce by up to 30 percent.
How long do fluorescent ballasts last?
A fluorescent ballast can last up to 10 years. However, it depends on the brand and type of ballast.
What happens if you don’t replace the ballast?
If you don’t replace the faulty ballast, the fluorescent light will become unstable without the right voltage supply. It will eventually stop working.
Reference: Fluorescent lamp Wikipedia, Compact fluorescent lamp Wikipedia.