A plumbing roof vent is very important for all houses as it removes the house’s sewage. The sewer gasses get released through this vent, thus improving the air quality inside the house. Generally, the plumbing vents pass through the roof, but is there no other way?
It is common for the plumbing vents to pass through the roof, but it is optional. Other alternatives include running them through exterior walls, installing air admittance valves, and loop venting. It would be best if you run the vent above the roof level of your house.
The local code for the plumbing vent goes 12 feet away from the wall. You have to check with your local building code for installing any alternative. This article will share the other alternatives to running the plumbing vents and step guides for their installment.
Check out our list of top-handpicked products for all your electrical, appliance, and HVAC system needs to keep your home running smoothly.
This post includes some affiliate links.What is a plumbing vent?
A plumbing vent is a system with pipes connected to the house’s P-traps. It leads to the vent stacks that pass through the roof.
All roofs cannot handle the passing of the plumbing vents, especially if your house is old or the roof is not stable for the pipes.
The builders and house owners sometimes want the plumbing vents to pass through the walls outside the house.
A plumbing vent is mandatory because the exhaust having the sewer odors won’t exit without the vent.
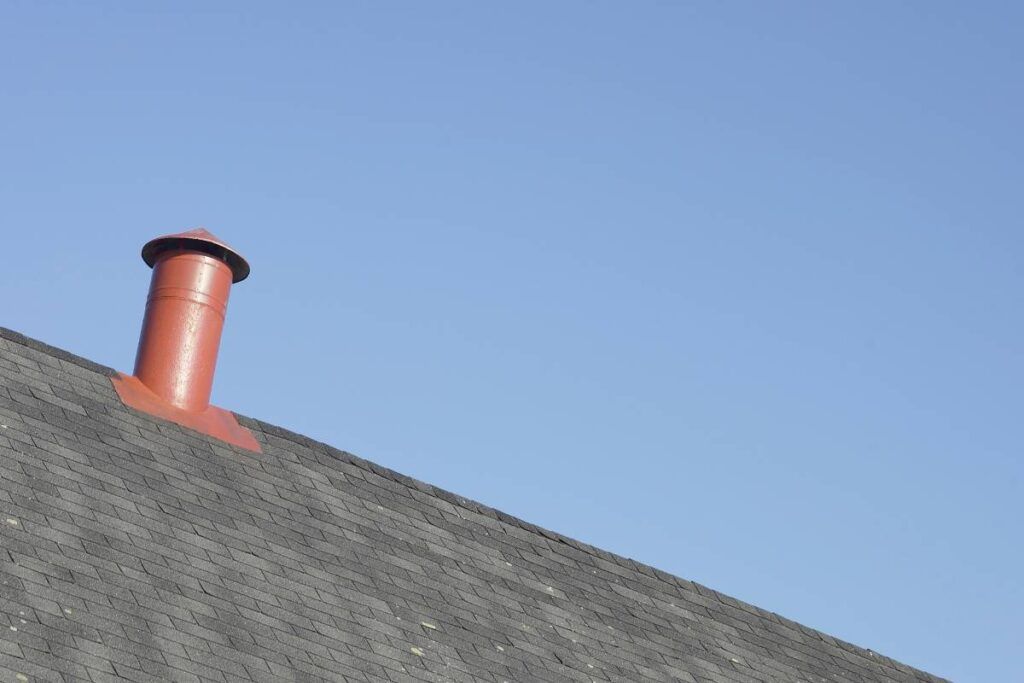
The plumbing vent passing through the roof is seen poking outside the roof directly above your house’s bathroom and connected to the water systems.
Why do you need a plumbing vent?

A plumbing vent in the house removes the wastewater and other wasters.
The drainage and vent utilities work together to allow the full plumbing system to work efficiently.
The drainage pipes remove the waste from your house to a septic tank or the local sewer.
The vent pipes allow fresh air to enter each plumbing fixture of your house.
The vent pipes help move the water through the pipes every time the sink gets drained or the toilet is flushed.
The plumbing vents also stop the sewer odors from entering your house and allow the wastewater and gas to escape.
If you do not have plumbing vents, the odors enter your house and fill it with bad smells, which can further harm your health.
Generally, the plumbing vents are located on the house roof, away from the air conditioners and windows, for the stenches can dissipate easily.
Common types of plumbing vent pipes
While installing a new plumbing vent, you need to get the right one for your house. Some good plumbing vents are:
- True vents: The vent is common with a vertical pipe hooked to the drain line. Since no water runs through it, you can vent it from the roof.
- Common vents: The vent can be used between 2 fixtures on opposite sides, like back-to-back sinks connected to a stack with the sanitary cross.
- Re-vent pipe or auxiliary vent: The vent is connected to the plumbing fixture or drain line. The vent runs over the main vent on the roof.
- Air admittance valve: It is a valve that opens when the wastewater starts draining. The valve allows air to come in and blocks the gas from entering the house with the help of gravity. This vent is for multiple fixtures.
Does the plumbing vent pipe have to be through the roof?

Plumbing vents passing through the roof only are optional.
There are other alternatives.
However, the vents passing through the roof are the common installation process.
You can also run the plumbing vents through the exterior walls, but you must ensure that the vent pipe extends above the roof.
Install the vent pipes on the outside walls without letting them pass higher than the roof.
You must ensure the pipe is taller than the highest window of your house.
All the house owners cannot reach the roof due to the house structure.
So, passing through the exterior walls is an alternative to roof venting.
Sometimes people run the vents and end up in the attic, but that is uncommon.
Another good alternative is installing an air admittance valve or AAV.
It can stop harmful chemicals from entering your house through the attic.
Another one is loop venting.
Here the vent connects to the P-trap and stands straight until it forms a loop and goes down the drain.
Loop venting is not allowed in all the zones.
So, you must consult the building codes before installing them.
How to install plumbing vents through the exterior walls?
You can vent through the exterior walls instead of the roof.
Before you start doing it, consult with the local codes to ensure that this method is compatible with your zone.
Contact the building department to get ahold of the codes.
Now, let’s learn how to install a plumbing vent through the outside walls.
Step 1: Cut the drain pipe
Find and see the P-trap for cutting.
The cut must be within the 5 feet range of the P-trap.
Use a hacksaw for cutting and carefully cut the drain pipe.
Step 2: Sand the pipe ends
Once you have finished the cutting, you need to smoothen the cut ends.
Use 120-grit sandpaper for $3 to $5, and sand and buff each cutting end of the pipe.
Sand the ends until both sides of the pipe’s cut portion becomes smooth and even.
Step 3: Install
You need to fill up the space where you have cut the pipes with the sanitary tee.
The sanitary tee will cost around $2 to $8.
Before filling the cutting ends with the sanitary tee, make sure that it fits in the pipe, and you can leave an open outlet pointed upwards.
Step 4: Extend the vent pipe
Maintain the pipe slope around 1/4th inch towards the slope and extend the pipe upwards.
Extend the vent pipe until you reach the point from where the pipe will pass through the wall and let it stay there.
Mark around the vent pipe on the wall at the place where you want it to pass through.
Make a hole with a saw in the wall, around ½ to ¾ inches bigger than the actual pipe’s size.
Push the vent pipe through that hole that goes out of the exterior wall.
Ensure a full foot clearance between the wall and the vent pipe.
Step 5: Seal the pipe
Come back to the hole through which you passed the pipe.
Install a pipe strapping along the wall and tie the pipe to it.
Put the pipe strapping in multiple places to be safe and careful.
Apply spray-foam insulation to the ½ to ¾ inch of extra room between the vent pipe and the wall’s hole and let it expand.
After the insulation expands, dries out, and cures itself, remove the excess foam around the hole.
How to install an air admittance valve?
If the local guidelines of your region allow you to install an air admittance valve or AAV instead of the roof vent pipe, you can install it.
AAVs are mechanical, and they work in gravity’s way. So, there will rarely be anything wrong here.
AAVs can support multiple vent lines, but they are mostly used as alternatives to vents.
AAVs are widely available and used, costing around $13 to $30.

Here are the steps to install an air admittance valve.
Step 1: Find the P-trap
Find the P-trap first.
It will have a little loop connecting to the drain line into the sanitary tee and then to the drain.
Step 2: Attach the PVC drain line
Measure the length of the PVC drain line at the same size as the sanitary tee and attach it.
Make sure the PVC sits well. You can use a threaded PVC line for a good seal.
Step 3: Put in the air admittance valve.
Locate the sanitary tee leading to the drain.
That is the spot where you have to place the air admittance valve.
If this valve sits vertically without obstructions like stored materials, everything will remain up to the code in maximum zones.
How to install loop venting?
Loop venting is the most simple method and alternative to roof venting.
You need a looped pipe going above the P-trap and down the drain.

Here are the steps:
Step 1: Install the P-trap
You must install the P-traps under the floor if your sinks are island sinks.
Reverse the P-trap by 180 degrees.
It will support the flow of water to go into the trap.
Step 2: Direct flow
Slope the drain by pointing it downwards.
Point the vent upwards and hook the old vent after the loop.
It will make sure the old venting is pointing down to the drain.
This maneuvering of the old pipes will create a loop, thus the name loop venting.
Your drain has become a vent now, and it does not have to go through the roof.
The reason behind this loop is that it can go down and be made to use the existing pipes maximum times.
What problems can arise with the plumbing vent pipes?
Sometimes when the plumbing vents work poorly, the whole drainage system of your house will also stop working.
The signs that the plumbing vents and drainage system have stopped working are:
- Standing water in the sink or bathtub
- Gurgling noises
- A slow-moving drain.
It could be due to the clogged vents due to dirt and debris.
Blockages in the plumbing vents will create too much pressure on the drainage pipes, interrupt the water flow, and lead to leakages.
Sometimes, you may get rid of a clogged drain, but the problem remains if the main reason is a blocked vent.
Suppose you cannot clear the drainage using a drain cleaner, plunger, or auger.
In that case, you are dealing with severe clogging, for which you may have to call professionals.
It will cost around $270 to unclog the vents by the professionals.
If the problem stays, the condition will worsen, and your house will get filled with sewer odors.
Should I cover the roof plumbing vents?

It is a great idea to cover the plumbing vents. Your house and the vent can benefit in multiple ways.
Safety
The vent remains on the rooftop, which means it is exposed to severe weather outside.
The vent can get clogged by dirt and debris.
If the problem stays long, your house will have bad sewer gasses.
Unclogging the debris by experts will cost $270.
So, it would be best to cover the vents to remain free from such issues.
It will also keep animals away from your vent.
Some of them enter and start making nests, which can be a sanitary issue.
Prevents mold
Covering the vents sometimes encourages mold.
But uncovered molds are more prone to mold formation.
The rainwater and moisture will remain trapped inside the vent and encourage mold.
Mold removal can be difficult and expensive.
If you ignore it, it will become unhealthy for the house members, especially people with allergies.
Covering the vent can save you from such issues.
Reduces noises
Noise can be annoying for both you and your neighbors.
Sometimes the vent creates disturbing noises.
Covering the vent will reduce this noise and keep you and your neighbors happy.
Prevents leakage and reduces pressure
Clogged vents create pressure and pressure fluctuations.
Too much pressure in the vent can cause the water to back up, causing leaks and other expensive damages.
The sewer odors, too, start entering your house.
A vent cap on the plumbing vent will prevent clogging and stop the pressure and leaks.
Vent stack caps will prevent dirt and debris from entering the plumbing vent and the system and help regulate the pressure.
Increased durability
Uncovered vents last for 10 years because they have to deal with the outside’s harsh environment, like heat, cold, winds, and rain.
Covering the vents will keep them safe from such conditions to some extent and increase their lifespan.
Covered vents will last up to 15 to 20 years.
How far should a plumbing vent pipe stick out of the roof?
The International Plumbing Code, or IPC, recommended that the vent pipe is at least 6 inches above the roof level per section of 905.5.
Sometimes, it is recommended to maintain at least 12 inches for weather protection.
If you use something else for weather protection, terminate 7 feet above the roof.
The vents must extend about 24 inches above the roof in snowy regions.
Final thoughts
A plumbing vent pipe passing through the roof is not the only option.
But it is the most common method of running the vent.
Other alternatives to the roof vent include:
- Installing the vent pipe through the exterior walls.
- Considering loop venting.
- Installing an air admittance valve.
Before considering the alternatives, consult with the local codes of your region to know which one applies to your zone.
It is good to cover the plumbing vents.
It can protect the vent from clogging, reduce noise, prevent leakages, and increase lifespan.
While installing the plumbing vent through the roof, make sure to install it at least 6 to 12 inches above the roof level.