A 3-way dimmer switch allows you to control the brightness of the light fixture from two locations. For example, if you have a 3-way dimmer for your hallway, you can increase or decrease the brightness from both switches. But how do you wire it?
The 3-way dimmer switch contains 3 terminals – common, traveler, and ground. Connect the standard terminals to the power source and light fixture and the traveler terminals to the other switch in the circuit. Turn on the power and check the fixture to see if it’s working properly.
It is just a brief explanation. Please read this article till the end to gather detailed knowledge about the basics of 3-way dimmer switches, their wiring procedure, and some tips and tricks for easy installation.
Check out our list of top-handpicked products for all your electrical, appliance, and HVAC system needs to keep your home running smoothly.
This post includes some affiliate links.The basics In’s and Out’s of 3-way dimmer switch wiring: Everything you need to know
A 3-way switch allows you to control a light fixture from two locations.
The 3-way switch will replace one of the existing switches to control the light fixture.
A dimmer switch allows you to control the brightness of that light.
If you install a 3-way dimmer switch, one switch will be a dimmer switch that controls the light’s brightness in the circuit.
The second switch will turn the light on/off, not the brightness.
Before you install a 3-way dimmer switch for your light, you must ensure that the light is compatible with the dimmer switch.
Otherwise, the installation would be useless.
There are two methods to wire a 3-way dimmer switch – the conventional method and the new CFL/LED compatible method.
In the traditional process, you need to pull the power from the main panel to one of the light switches, then from the switch to the light, and lastly, from the light to the second switch.
In the new compatible method, the LED and CFL loads will use extra wires to pull power from the panel to both switches and connect a neutral connection separately.
It will allow both switches to work independently.
The ultimate guide to wiring a 3-way dimmer switch for perfect lighting

Before you start wiring the 3-way dimmer switch, you should know the wire colors and how to use them:
- The black wires are the hot LINE wires
- The red wires are the hot LOAD wires
- The white wires are the neutral wires.
- The grounding wires are bare copper, green or brown wires.
- The traveler wire can be of any color.
Let’s go to the step guide to wiring a 3-way dimmer switch.
- Turn off the power at the breaker first to avoid electrocution while working.
- Sort out the wires in the wall socket. Set two cable sets – one from the light fixture and the other from the on-off switch.
- Check the wires and ensure that ⅝ inch of the wire remains bare. Use a wire stripper to strip off some parts of the insulation.
- Whether you replace the old switch or install a new dimmer switch, you should always begin by identifying the grounding wires.
- Use a copper crimping sleeve and connect the grounding wires together. Clip off one wire’s end, and you will have one grounding wire.
- Locate the neutral wires and twist them together and use a wire nut to secure them. Push them back to the housing, as you won’t need them.
- Now, you have two traveler wires, one hot wire, and one copper grounding wire.
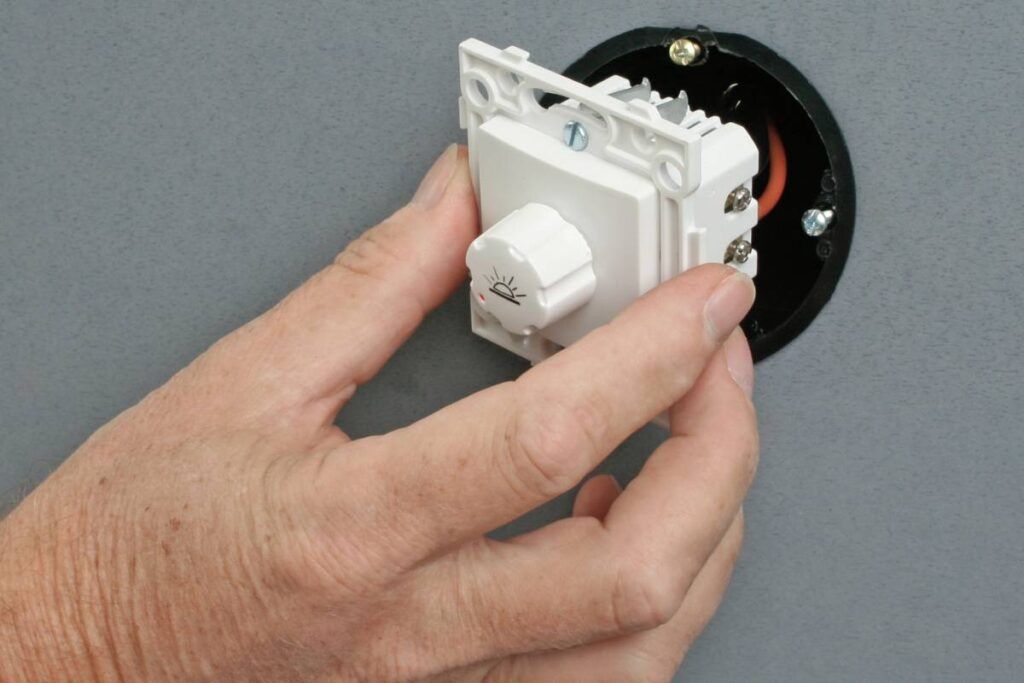
- Check the dimmer switch and see if you have wires to connect with the wires from the wall socket. Sometimes, the dimmer will have terminals with screws. Some dimmers have cables looped tightly around the screw. Insect the wire ends under the screw, and tighten the screw properly.
- Curve the wire ends and make a tight loop based on the switch design. You can also trim the wire insulation and ensure the exposed parts are fitted under the screws.
- Make sure no loose ends are present to touch each other or create a short circuit.
- Connect the traveler wire to the bottom two terminals on the dimmer switch’s sides.
- The remaining grounding and hot wires will be connected to the terminals on the dimmer switch’s top side.
- Once the wire connections are made, check for the wires’ secure connection.
- Replace or install the dimmer switch in the wall socket and screw it properly.
- Test the dimmer to see its functionality.
- Go to the circuit and turn on the light fixture’s power.
DIY wiring a 3-way switch: A comprehensive tutorial for beginners

You can wire a 3-way switch in the gang box away from the light or wire it to the light itself.
Here is a comprehensive tutorial for beginners to wire a 3-way dimmer switch.
You can either follow this or the one discussed in the previous answers.
Let’s begin.
Safety steps
- Turning off the circuit breaker that powers the light you will be working with is necessary.
- Remove the switch plate and unscrew the old switch from the wall.
- Avoid removing the wires unless you are sure what you plan to do.
- Pull out the external wires a little and ensure no wires touch each other.
Determining the wires
- Make sure that the external switch and the light are off.
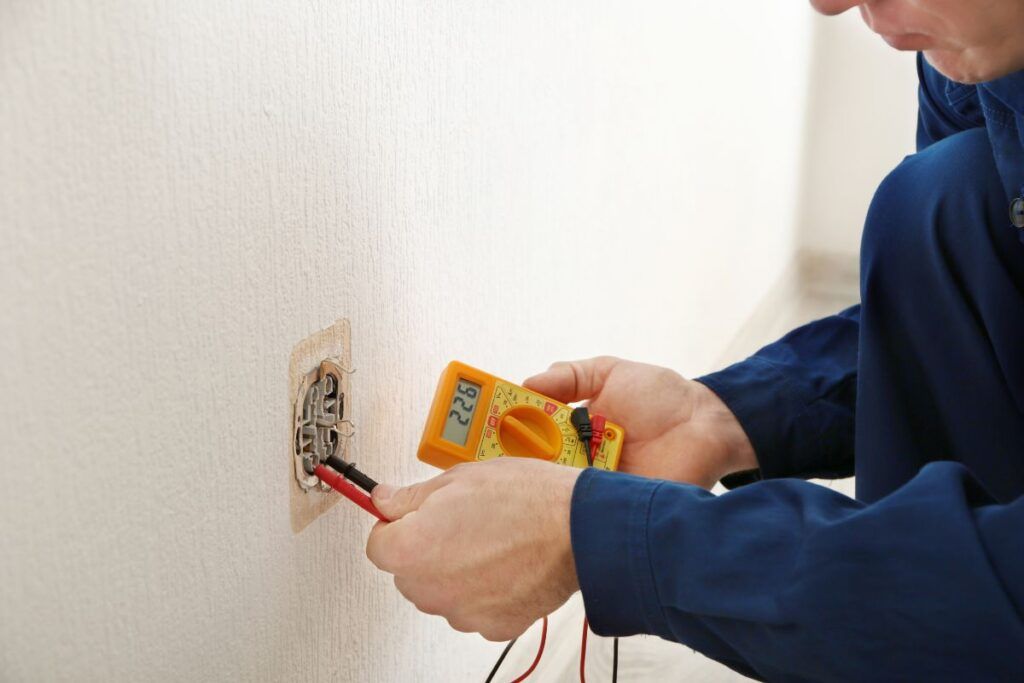
- Use a voltage tester and take it close to the terminals. The wire colors can help you determine the wire type, but only sometimes because the manufacturer will interchange the colors. Contact your manufacturer for help.
- One of the hot wires (black or red) that doesn’t show voltage is the load wire, and the other hot wire with voltage is the line wire. The white neutral will have nearly zero or no voltage. An extra red wire is a traveler from the 3-way external switch.
- Turn off the breaker and ensure no voltage runs through the black wires.
- Mark the black wires to determine which is a load or a line.
Wiring the dimmer switch
- Remove the wires from the external switch, and replace them with the dimmer switch.
- Wire the traveler wire (red wire) to the traveler terminal.
- Wire the live wire to the dimmer switch’s bottom terminal and the line wire to the top terminal.
- Wire both the neutral wires to the neutral terminal in the dimmer switch.
- Wire the 3rd white wire to the neutral terminal on the dimmer switch.
Rewiring the 3-way switch
- Remove the black wire from the external switch and connect it with the CAP in the load.
- Connect the third extra white wire in the COM terminal of the external switch. Connect the wire’s other end to the neutral and cap off the neutral connection.
- Leave the red wire in its original place.
- Check the switch’s continuity with a multimeter and turn on the power at the breaker to test the switch.
3-way dimmer switch wiring: Tips and tricks for a professional and smooth installation

Dealing with electrical wires can be dangerous.
That is why most people prefer calling a professional to wire a 3-way dimmer switch.
Here are some tips and tricks for a professional installation:
- Always turn off the power at the circuit breaker before you start working with the electrical wires. Use a voltage tester to confirm that no power runs through it.
- Gather the tools for wiring a 3-way dimmer switch – voltage tester or a multimeter, screwdriver, wire strippers, pliers, electrical tape, wire nuts, and a 3-way dimmer switch.
- Use a compatible dimmer switch for the light. The dimmer switches can be installed for all regular bulbs, but the bulbs don’t fit compatible with the dimmer switches. So, first, confirm the compatibility and then install the switch.
- The dimmer switch’s load capacity must match the light’s total wattage. Exceeding the load will result in overheating and fire hazards.
- Use wire nuts or connections to securely attach the wires to the switch and abandon the wires and cover them, which won’t be needed for further usage.
- After you have made the wire connections, double-check all of them and ensure that no loose connections or loose ends exist.
- Ensure that you have appropriately grounded the switch. If there is no ground wire, connect a grounding pigtail wire to ground the switch.
- Mark the switches and the wires with a marker or electrical tape to identify them later when needed. It will help in troubleshooting any issues.
- After finishing the wiring, test the switch and ensure it works correctly.
- If you are in doubt, consult an electrician for help.
Mastering wiring a 3-way dimmer switch: Expert advice and techniques.
Mastering wiring a 3-way dimmer switch or any other switch is difficult, especially if you are a beginner.
Wire connections can be risky because if you connect them to the wrong terminals and screws, there could be chances of fire hazards.
So, here are some advice and tips for a safe and perfect wiring installation:
Turn off the circuit.
Always turn off the power at the circuit before you start working with the electrical wires.
Go to the main panel, locate the circuit powering the light fixture, and turn it off.
It will stop the power flowing to the fixture and prevent electrocution.
Also, put tape on the circuit for some time to warn people that work is going on on that particular circuit.
Go to the work site and confirm that the lights are off. To confirm that no power is running, use a multimeter.
Know how to use a multimeter.
Buy a multimeter and learn how to use it before approaching the wiring installation.
It will let you know which wires are still energized after turning off the power and the wires’ functionality and continuity after the connections are done.
To use the multimeter, set it to AC voltage, put the black probe to neutral, and the red probe to the ground. The result should be 0V.
Let the black probe be neutral and shift the red to the other wires; the voltage should be 120V.
If all the terminals show 0V, you can proceed with wiring and installation.
I have a 3-way dimmer switch in my hallway.
Before the wiring, I used a non-contact voltage tester instead of a multimeter to check the wiring voltage twice to ensure no power runs.
You can use a non-contact voltage tester instead of a multimeter.
Take the device near the wires. When the wire has a voltage, the device will illuminate or beep.
Know the switch
Ensure you are wiring the suitable dimmer switch to control the light/s and that there is power in the circuit using a bulb or an appliance.
However, the bulb not glowing does not assure that there is no electricity in the switch or the wall outlet because the device can be at fault. So, do not blindly believe it.
Confirm the switch type.
When the light is connected to only one switch to turn on and off, you have a 2-way switch.
But, when you can control the fixture from two switches at different locations, you have a 3-way switch.
Confirm that the light supports the 3-way dimmer switch wiring if you want to install a dimmer switch.
You can control only one light while installing the dimmer.
You cannot have two dimmers for one light.
In a 3-way switch, one switch will be for the on/off switch and dimming, and the other will be only for on/off.
Use a smart device
Turn on the light switch that you will replace with a smart device.
If the light is on, as usual, there is power in the light bulb.
If your bulb is smart, activate it with a remote control or mobile apps to light it up.
Know the wire functions.
You must know the actual function of each wire before approaching the wire connections.
Avoid touching any exposed wires or any metal parts inside the switch.
Treat all the wires as hot wires, even if you have turned off the power at the circuit.
The black wires are line hot wires, the red wires are load hot wires, the white is neutral, and the bare copper, green, or brown wires are the ground wires.
Wire type to use

Most dimmer switches will use a 12/2 wire with three cables to connect to the fixture.
You can also use a 12/3 wire with four cables to run it between the dimmer and the on/off switch.
The new wires come with a green ground wire and a screw where you will connect the ground wire from the switch housing.
You must identify the wires to connect them to the proper terminals.
Final thoughts
Wiring a 3-way light switch is easy yet complicated. If you have done electrical wiring work before, it will be effortless once you get the correct instructions. But for a beginner, it is better to consult an electrician for help.
This guide provides a detailed guide about the wiring of a 3-way dimmer switch and an easy tutorial for beginners. Follow them for the correct wire connections. Follow the advice, tips, and tricks for a successful and safe 3-way dimmer switch installation.
To master the art of wiring, follow up on the basic ins and outs and techniques explained in the article.
Can I install two dimmers on a 3-way switch?
You will have only one dimmer switch for every set of light fixtures controlled by one on-off switch. The second one will control only the light and not the brightness.
Can I have a 3-way dimmer switch as a single pole?
Most 3-way switches are single pole double through or have three screw terminals. So, there is no problem in wiring the 3-way dimmer switches to a single-pole wiring circuit.
Can I install a 3-way dimmer switch on a 4-way circuit?
Yes, you can install a 3-way dimmer in a 4-way circuit. Ensure the dimmer’s voltage and amp rating are compatible with your circuit.
Reference: 3-way Switching Wikipedia